It's also hard to believe that this is our last Christmas in August challenge for Dreamweaver Stencils. Every month seems to fly by faster and faster. We hope you have been inspired to create your holiday cards and that we have made it a little easier! We would love for you to join our challenges, just link your creation over at the DREAM it UP! blog or send a photo to lynell@dreamweaverstencils.com and she will post it for you.
This week I was inspired by a technique that we used recently in a card club exchange group I belong to. It is a processes where you cut three layers of matching cardstock( each layer is about 1" smaller each direction) and lightly tack the layers together before stamping a large background image or a smaller image several times. Then you mat each layer in a coordinating color and line them back up. It is a very cool look. Here is the card I created for that club using a couple of stamps from Stampers Anonymous Tim Holtz collection:

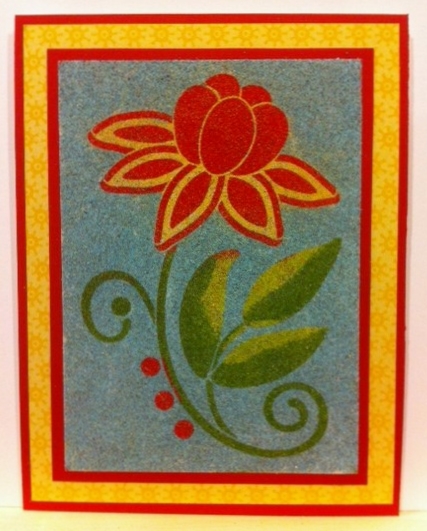
And here is the card I created using the same process but with Dreamweaver Stencils products:
 |
| LJ922 Christmas borders and LL469 Xmas icons Glossy Red Embossing Paste and Crystal glitter from Art Glitter |
The steps:
- Cut one piece of white cardstock 4 1/4" x 5 1/2"
- Cut one piece of white cardstock 3 1/4" x 4 1/2"
- Cut one piece of white cardstock 2 1/4" x 3 1/2"
- I used a little dot roller in each corner to adhere the three layers one on top of the other
- Place the Christmas borders stencil (LJ922) on the stack and tape in place with removable tape
- Use a palette knife and paste spreader to apply a coat of Glossy Red Embossing Paste over the image
- Remove the stencil and place in water for cleaning later
- Immediately sprinkle the wet paste with Crystal glitter, carefully tapping off the extra paste
- Set the layered piece aside to dry
- Tape the Xmas icons stencil (LL469) to a small square of white cardstock, positioning the poinsettia portion over the paper and taping off the other sections with removable tape
- Apply Glossy Red Embossing Paste over the poinsettia area
- Remove stencil and place in water for cleaning later
- Sprinkle the wet paste with Crystal glitter
- Set aside to dry
- Cut one piece of dark green cardstock (I used a shimmer cardstock) 4 1/4" x 5 1/2" (yes, that's right)
- Cut one piece of dark green cardstock 3 1/2" x 4 3/4"
- Cut one piece of dark green cardstock 2 1/2" x 3 3/4"
- Cut one piece of dark green cardstock 1 7/8" x 1 7/8"
- Cut a strip of dark green cardstock 3/4" x 4 1/4"
- When the paste is dry, carefully separate the three layers, I ran the edge of my palette knife under the edges to help get them apart
- Trim the edges of the largest layer right to the edge of the paste
- Mount each pasted layer on its matching dark green layer and then on top of each other
- Adhere the strip of dark green across the three layers
- Trim around the poinsettia image leaving just a small white edge all the way around
- Mount it on the small dark green square and then on the card front
- Cut a base card from white cardstock either 5 1/2" x 8 1/2" (scored at 4 1/4" for a side fold card) or 4 1/4" x 11" (scored at 5 1/2" for a top fold card)
- Adhere the card front to the base card
Before you head over to the other team member blogs, I just want to let you know that next month we will be doing a collaboration all month long with the team from Art Glitter! We are very excited and look forward to having our own Kristi Parker Van Doren back as a guest designer for the month! You won't want to miss any of it!
This week's designer links:
Happy Creating,
Louise