Dreamweaver Stencils just released 6 wonderful new stencils that should be getting to stores near you very soon. One of the new designs is a darling little fox. Actually, it comes in two sizes, which is even better! We live in the Tri-cities area of Illinois right along the Fox River, so this little guy immediately won my heart. I'm sure you'll be seeing several ideas for these new beauties in the next couple weeks on the team blogs.
This week I have created a little post-it note gift. I love how just a little paper and a cute design really dresses up an every day staple. I used to make these for my kids' teachers. They always appreciated them because we all know teachers can use a lot of notes throughout a school year. They make great little favors for parties too, and can be made in any size to fit whatever size notepad you have.
 |
| LM2016 Small Fox |
 |
| First create the folder from decorative cardstock. Stencil inks over the Small Fox stencil. Decorate the folder with the stenciled image, a strip of blue, and brads |
 |
| Glue a post-it notepad inside. Notice the little flap folded over the one edge, underneath that I put a little strip of magnet, and one on the outside front of the cover to act as a closure. |
 |
| Here it is from the side. The green notepad matches the green circles on the paper |
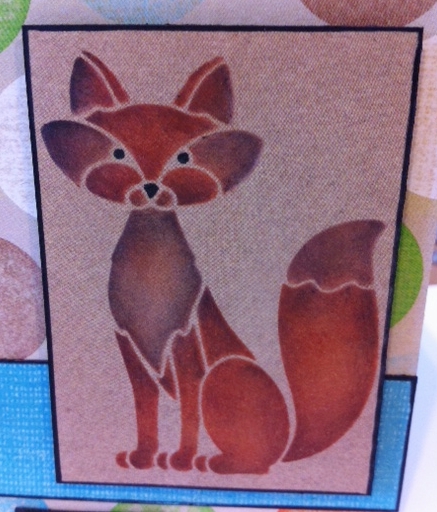 |
| Here's a close up of the fox. I used Brilliance Inks (Rust, Beige, Coffee Bean, and Graphite Black) The paper he is stenciled on is the back side of the circle paper the folder is made from. |
The paper is from BASICEGREY's bow ties collection called marbles and dodge ball. The folder is 4 1/8" x 10", scored 3 1/2" from one end, then move over 1/2", move over 4 1/16", move over 1/2", then 3/4" scoring after each move. There should be 5/8" left after the last score. Fold it all up, decorate it, and you're done! Sometimes I use a cute ribbon as a closure, or two brads and a string, it depends what the outside looks like and what seems to fit.
Be sure to see what out other team members have created this week, then get creative yourself and join our monthly challenge! Sign up over at the DREAM it UP! blog.
Dream It Up!
Laura Drahozal
Lyn Bernatovich
Pam Hornschu
Heidi Erickson
Louise Healy (you're here)
Jessica Griffin
Cyndi Bundy
Laura Drahozal
Lyn Bernatovich
Pam Hornschu
Heidi Erickson
Louise Healy (you're here)
Jessica Griffin
Cyndi Bundy
Happy Creating,
Louise