Tuesday, August 31, 2010
Crafting Fun
Last Saturday I got together with a group of friends for a day of crafting. It was so much fun and very inspirational. Each of us brought a project for the group to do, and spent the day being creative. It was relaxing and wonderful! Here's what we created.
The little frame was stamped and colored with PrismaColor pencils, then a little Distress Inks rubbed in the background.
The pumpkin was glittered with glass glitter shards and ultrafine to fill in. The leaves were 2 fabric leaves glued together with a wire in between, and the tops glittered, and some gold wire coiled for tendrils. When it was dry, we used a craft pick to make holes and glued in the leaves and tendrils.
The sunflowers are made from grungepaper, with grungeboard for the stems., colored with Distress Inks, the centers are chip board colored and stamped. Everything was assembled with a hot glue gun with bamboo skewers to create "pics" , arranged in a great tin pot, and embellished with ribbon and a tag.
The notecard folder has little pockets inside to hold 4 notecards and envelopes. It is so easy. Cover two pieces of lightweight cardboard with pretty paper, adhere them to some contrasting paper for a spine, leaving about a 3/4" gap, cover the inside with coordinating paper and create matching notecards.
Every project turned out great. Thank you to my friends who made the day so much fun!
Happy Creating,
Louise
Thursday, August 26, 2010
Go Green!
It seems like the trend lately is to try to be "green", which is a good thing of course. We definitely need to be aware of our impact to our surroundings. In that line, Lynell created a great background stencil called "Go Green" (LX7000), well that's what I call it, but you can see why. It is an extra large background stencil that easily fits a standard A2 size card front.
In the true spirit of "going green", the card with the Hawaiian image was made from an old travel magazine that I knew I was saving for a reason! I ripped out a page that had a beautiful beach scene for the background, ran that through my Big Shot to emboss the Go Green stencil, then sanded it gently to accentuate the words. The image and mat layer were from the same magazine. It could be a great Bon Voyage card, or an all occasion card for someone who loves Hawaii (is there someone who doesn't!). The little card above that uses gold paste and the little gecko stencil, and just one of the Go Green word sets cut out with some green ink brush on it.
The other card really showcases the whole stencil. I ran kraft colored cardstock through the Big Shot, then brushed ink over the raised area to give it a "distressed" look. Embellish with old string and a rusty old coin and you end up with another great all occasion card.
On another note, the go green theme can definitely be applied to Christmas cards as well. Lynell had a great sample of a Christmas tree shape using this stencil. If we ask her nicely, I bet she'll get that posted on her blog soon!
Happy creating,
Louise
Monday, August 23, 2010
Hallelujah!
This beautiful new Hallelujah stencil (LM207) from Dreamweaver will be perfect for your Christmas cards. Here are two samples to get you inspired!
has a fiber texture, but the result is so beautiful it is worth taking the time to learn to do it! Mount the background paper to a cream colored base card and use foam tape to add the Hallelujah image.
The other sample was done using the Pearlescent Embossing Paste on the inside of one of Dreamweaver's long oval window cards. Working quickly, leave the stencil in place over the wet paste and use a brush or Q-tip to pick up some Metallic F/X powder and sprinkle it over the wet paste (I used Kimono Red F/X15 and Gold Dust F/X01). Remove the stencil and place in water. Gently tap the back side of the image to make the powders "jump" around and help spread them
This first card was done using White Glossy Embossing Paste on a turquoise colored Tsugumi cardstock by Hanko Papers. After removing the stencil, sprinkle the wet paste with Crystal glitter. When the paste is dry, deckle the edge and mount on a black mat that has been edged with gold Krylon pen. The background paper is one of Hanko's beautiful washi papers also edged with the gold Krylon pen. It is a little tricky edging the washi because it is lighter weight and
has a fiber texture, but the result is so beautiful it is worth taking the time to learn to do it! Mount the background paper to a cream colored base card and use foam tape to add the Hallelujah image.
The other sample was done using the Pearlescent Embossing Paste on the inside of one of Dreamweaver's long oval window cards. Working quickly, leave the stencil in place over the wet paste and use a brush or Q-tip to pick up some Metallic F/X powder and sprinkle it over the wet paste (I used Kimono Red F/X15 and Gold Dust F/X01). Remove the stencil and place in water. Gently tap the back side of the image to make the powders "jump" around and help spread them
over the image. Let dry thoroughly. When dry, use a clean soft stencil brush or a swifter cloth to remove any extra powder. Brush the outside front of the card with Brilliance Galaxy Gold on a No. 12 Stencil brush (very large), being sure to place a piece of scrap paper inside the card to protect the image in the opening. Embellish with strips of coordinating paper and a brad or charm.
Happy Creating,
Louise
Saturday, August 21, 2010
One more sample
Here is one more sample using the Holly Flourish (LG731) and the Christmas (LL3009) stencils. A completely different look than the distress card I showed the other day. For this look, start with paste embossing the Christmas stencil with green glossy paste (make your own by adding green acrylic paint from a tube to the Translucent Paste). Let the paste dry, then place the clean stencil back over the green paste and apply Stamp and Stick to the paste with a finger dabber. Remove the stencil and let the glue get tacky for a couple of minutes. Place gold leafing over the glue and pounce it down with a 3/4" stencil brush. Brush away extra leafing and save it to a container for another project. Edge with gold Krylon pen. Dry emboss the Holly Flourish on smooth cardstock and deckle the bottom edge. Edge with gold Krylon pen. Layer the holly layer onto a dark green card. Layer the Christmas image on a matching piece of dark green cardstock and adhere to the holly layer for a much more "traditional" look.
Happy Creating,
Louise
Tuesday, August 17, 2010
New Holly Flourish
This new holly flourish (LG731) from Dreamweaver is so versatile. You saw it in the background of my last post, but it is fabulous as the focal point as well. For this technique, you start by paste embossing the holly flourish with yellow matte embossing paste on white cardstock. Remove and clean the stencil and let the image dry. Place the clean stencil back over the dry paste and use small stencil brushes with pigment inks to add color on top of the yellow paste. Remove the stencil and coat the pigment ink with clear embossing powder. Tap off extra embossing powder and heat set. Layer on red and green mats then onto a 5" x 7" card. Repeat the steps for the Seasons Greeting stencil (LS91) and attach to main card with foam mounting tape. Simple but beautiful.
Happy Creating,
Louise
Happy Creating,
Louise
Monday, August 16, 2010
Think Outside the Box
We all get in ruts now and then with how we view certain things, especially Christmas. The colors associated with Christmas are red, green, blue (snowy), maybe silver and gold. This card is another sample I did for Dreamweaver Stencils for the display at CHA this summer.
Start by using Green Glossy Embossing Paste on white linen with the Christmas stencil (LL3009) and let that dry. While that's drying use Distress Inks to rouge some color onto a 4" x 5 1/4" piece of white cardstock. Stencil the holly design (LG731) on top of the background colors using Distress Ink Pine Needles. Use the Pine Needles to edge that layer as well. A red glitter pen on the berries of the holly adds a little sparkle. When the green paste is dry, rouge the same Distress Ink colors into the background, edge with the Pine Needles. Embellish and assemble as desired. I love using different colors than you would expect for Christmas cards, it really makes them unique. The green paste takes on a completely different look when you distress around it.
Happy Creating,
Louise
Louise
Thursday, August 12, 2010
Summer Beauty
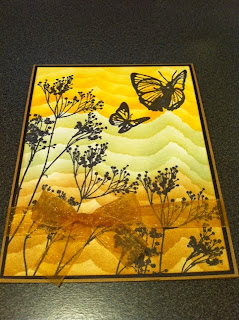
This is a beautiful technique we used in card club last month. I just love how this turned out and would definitely use this technique again. It is very easy, but does get monotonous if you are doing very many cards at a time (I usually make 12 of a design, 10 for club and a couple to have on hand to send out). Simply start with smooth white cardstock cut to the size you want your finished image to be. Use a scrap of white cardstock a little bigger than first piece and tear one edge of it in a random patter. Choose two or three colors of Distress Inks. Cut a small piece of Cut 'n' Dry Foam for each color of ink. Lay the torn paper across your smooth cardstock about 1/2" from one edge and use the foam to apply the first color of ink. Start on the torn paper and swipe the ink over the torn edge onto the smooth cardstock. Don't let it get too dark. Move the torn paper down about 1/2" and add more ink. Do this a couple of times then move to the next color and repeat the steps until you have colored the whole background. Use black in to stamp a design over the colored background. The possibilities are endless!
Happy Creating,
Louise
Wednesday, August 11, 2010
Beautiful Peacocks
The beautiful new Peacock stencil from Dreamweaver (LG730) is so versatile. You can really change the look of it depending on the paste and technique you use. These three cards are for my upcoming class at The Cottage Stamper in St. Charles IL on August 24th. There were still a couple of openings in the daytime class if you are in the area. Call Nancy and sign up!
Choosing the right papers to compliment your image can make a huge difference to your final design. Don't be afraid to add a flourish on top of a subtle background design, such as in the green card. It creates at tie between the image and the background. I love using the crystal and pearl gems you can get now. If you click on the picture of the cards, it will give you a larger view so you can see how using a gem in the eye of the peacock really brings the image to life.
Happy Creating,
Louise
Monday, August 9, 2010
More Dreamweaver Samples
Hello all, sorry I have been neglecting my blog this last week. I honestly don't know where the days go! Here are a couple more pictures from the Dreamweaver booth at CHA. I wish I had more but we got so busy I forgot to take pictures. All the samples were beautiful, and this picture really doesn't do them justice.
I have included another sample of the sleigh. This one is done with gold embossing paste. After it was dry, I stenciled Rocket Red Brilliance ink on the sleigh, coated it with clear embossing powder and heat embossed it. I put the stencil back on and inked and embossed a second time to really make it glossy. I used a No. 12 stencil brush (very large) to brush some color around the edges and soften the look. This is a fun stencil that looks great no matter what technique you use!
Happy creating,
Louise
Subscribe to:
Posts (Atom)