Wednesday, February 22, 2017

Chive Chewing!

HMH04 Chive Chewing


Stampendous:
HMCH04 Chive Chewing Cling Stamp
DCP1005 Fitted Frames A Cutting Die Set Size F
MPW811 Mixed Media White Paper
Acrylic Handle
MEM01 Memento™ Tuxedo Black Ink by Tsukineko®

Dreamweaver:
DWLL332 Picasso Stencil
DWHNB-12 1/2" Brush #12 Natural Handle

Plus:
My Colors Cardstock - Plum, Lilac Mist
DCWV Green Cork Paper
Copic Sketch Markers - BV00, BV02, BV04, BV11, E01, E31, E33, E37, E95, YG01, YG03, T1
Brilliance Inks Moonlight White, Lavender
Die Cut Machine
WhiskerGraphics Baker's Twine
Scrapbook Adhesive White Foam Squares

Instructions:
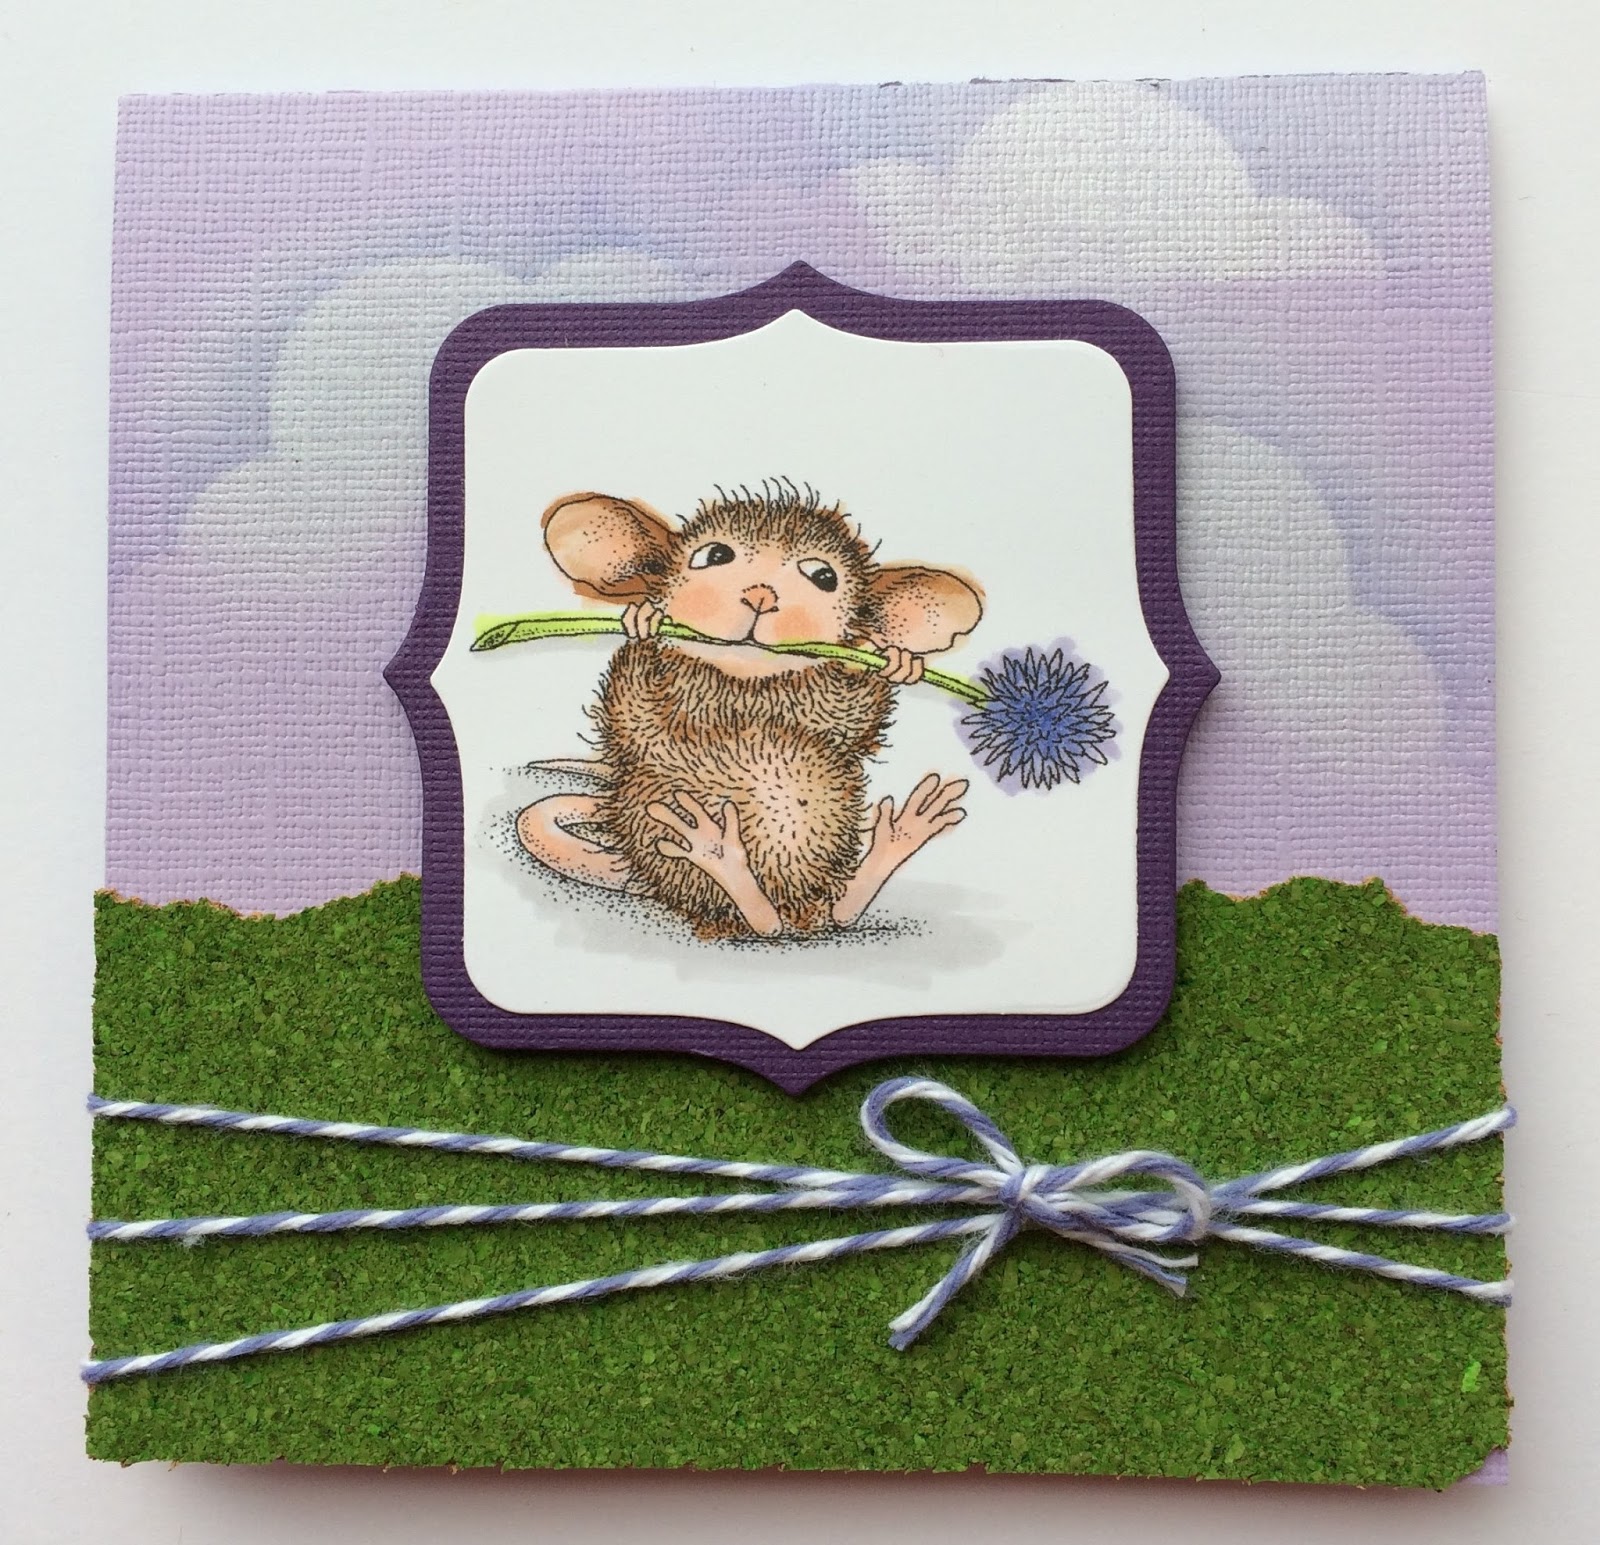
Step 1:  Fold a 4 1/4" x 8 1/2" piece of Lilac Mist cardstock in half to form a square, top fold card
Step 2:  Use a 1/2" stencil brush and Brilliance Moonlight White ink to rouge 3 areas of white ink for the clouds
Step 3: Tape off the small openings on the Picasso Stencil with removable tape, place cloud edge over one of the white areas and use a 1/2" stencil brush to lightly brush Lavender ink off the Picasso towards the paper, repeat to form as many clouds as you want
Step 4:  Stamp the Chive Chewing image on a piece of Mixed Media White cardstock using Memento Tuxedo Black Ink, color with Copic Markers
Step 5:  Using the size F frames from the Fitted Frames set, cut the larger frame on Plum cardstock and the smaller frame on the colored image
Step 6: Adhere the two frames together
Step 7:  Tear one long edge of a 2" x 4 1/4" piece of green cork and adhere the cork to the bottom edge of the card front
Step 8: Tie a piece of Baker's Twine around the green cork three times and tie a bow
Step 9: Use foam squares to attach the mouse image to the center


Happy Creating,
Louise

Thursday, February 16, 2017

Spring Beauty!

It's the middle of February and the days are getting longer and longer. The sun is getting stronger by the day and I'm really looking forward to the glorious days of Spring! With Spring comes the beauty of wildflowers and the budding of the trees, miracles of nature! Now that we live in Ohio, I'm really looking forward to our first Spring to watch spring unfold in all it's beauty. 

One of my favorite "spring-time" blossoms are the delicate blossoms of the Dogwood trees. My card today features the Dreamweaver Dogwood Stencil (DWLG668).


Supplies:

Stampendous:
MPW811 Mixed Media White Paper

Dreamweaver:
DWLG668 Dogwood Stencil
DWLL332 Picasso Stencil
DWDEP Regular Embossing Paste
DWDPK Dreamweaver Palette Knife
DWLM2010 Paste Spreader
DWGHB-6 1/4" Brush #6 Gold Handle Brush

Plus:
My Color Cardstock Grasshopper
Graphic45 Come Away With Me Collection Cosmopolitan 4500920
Brilliance Ink - P. Thyme, Sunflower Yellow, P. Coral, Coffee Bean
Creative Impressions 3/4" Dusty Rose Crepe Ribbon 70126
Fabri-Tac
Removable Tape
Foam Tape

Instructions:
Step 1:  Fold a 6" x 12" piece of Grasshopper cardstock in half to form a square card
Step 2: Tape the Dogwood stencil to a 3 1/2" x 3 1/2" piece of  white paper with removable tape
Step 3: Use a palette knife and paste spreader to apply Regular Embossing Paste over the design, remove stencil and place in water for cleaning later, let paste dry
Step 4:  Tape the clean dry stencil back over the dry paste with removable tape, use 1/4" stencil brushes and the Picasso tool to apply inks to the dry paste
Step 5:  Cut a 5" x 5" piece of white cardstock and a 4 3/4" x 4 3/4" piece of the Graphic 45 paper, adhere them together then to the card front
Step 6: Adhere the Dogwood to a 3 3/4" x  3 3/4" piece of Grasshopper cardstock, use foam tape to apply the Dogwood to the card front
Step 7:  Tie a small bow from the Dusty Rose Ribbon and add to the card with Fabri-Tac

Be sure to stop over at the Stampendous Blog for more lovely ideas!

Happy Creating,
Louise

Thursday, February 9, 2017

Bee Mine!

It's almost Valentine's Day! Have you made a card for your special someone(s) yet??? Stampendous has so many wonderful stamps for creating the perfect card! This week the design team is sharing some designs featuring various stamps and stencils that fit our theme "Bee Mine!", right in time for Valentine's Day.

This is a card I made a while back using the Dreamweaver Honeycomb stencil (DWLJ806) in the background, paired with the adorable Garden Hive stamp (P280)

"Bee Mine!"
Supplies
Stampendous
CRP280 Cling Garden Hive
Acrylic Handle
MPW811 Mixed Media White Paper
MEM01 Memento™ Tuxedo Black Ink by Tsukineko®

Dreamweaver
DWLJ806 Honeycomb Stencil
DWDEP Regular Embossing Paste
DWDPK Dreamweaver Palette Knife
DWLM2010 Paste Spreader

Plus
Bazzill Basics cardstock Pollen
My Colors Cardstock Cafe Ole
Copic Markers - Y13, Y17, YR16, YR24, E33, 100, YG03, YG06, YG17, RV000, RV02, RV34, R59, W1, W2, W4, W6, B0000, BG90
Foam tape
May Arts Ribbon
Craft Glue Dots
Removable Tape
Double-sided tape

Instructions

Step 1:  Fold a 6" x 9 1/2" piece of Pollen cardstock in half to form an A6 card

Step 2:  Stamp the Garden Hive on a 2 7/8" x 4 1/2" piece of Mixed Media paper with Memento Tuxedo Black ink, color with Copic Markers

Step 3:  Tape the Honeycomb stencil to a  4 1/4" x 5 1/2" piece of brown cardstock with removable tape, use a palette knife and paste spreader to apply a coat of Regular Embossing Paste over the stencil, remove stencil and place in water for cleaning, let paste dry

Step 4:  Color the dry paste with Copic Markers, trim edges close to the design

Step 5:  Adhere the Honeycomb to the card front setting it at an angle

Step 6:  Use Craft Glue Dots to attach a pink ribbon across the card

Step 7:  Adhere the Garden Hive to a 3" x 4 5/8" piece of brown cardstock and use foam tape to attach it to the honeycomb layer

Step 8:  Tie a small pink bow to match the ribbon, attach with a Craft Glue Dot

Head over to the Stampendous Blog for more great ideas!
Happy Creating,
Louise

Wednesday, February 1, 2017

Indigo Cats!

Have you seen these fabulous new stamps from Stampendous!!! The new line of Laurel Burch stamps are wonderful, if you haven't seen them, click here!

This week Stampendous is featuring creations using the Laurel Burch collections. Here's a fun card I did using the Indigo Cats.


Stampendous:
LBCRS02 Laurel Burch Cling Indigo Cats Stamp Set
MPW811 Mixed Media White Paper
Acrylic Handle
MEM01 Memento™ Tuxedo Black Ink by Tsukineko®

Plus:
My Color Cardstock Grape Vine
Watercolor cold press 140 lb
Copic Sketch Markers - Y00, Y17, YR000, YR04, YR07, R30, R22, R29, RV02, RV06, BV00, V12, V17, YG01, YG06, 100
Faber Castell Aquarelle Pencils - 105, 111, 121, 123, 130, 136, 139
Spritzer
Black Foam Tape

Instructions:
Step 1:  Fold a 7" x 10" piece of Grape Vine cardstock in half to form an A7 card
Step 2:  Stamp the Indigo Cats and Butterfly images on white cardstock with Tuxedo Black ink, color with Copic markers, cut out close to the outline, edge with the 100 marker
Step 3: Cut a 4 3/4" x 6 3/4" piece of watercolor paper, use the watercolor pencils and a wet paint brush to blend the background
Step 4: Place the stencil from the stamp set on the background, use the Spritzer and Copic Markers to add some designs to the background
Step 5:  Adhere the background to the card front
Step 6:  Arrange the cats and butterflies on the background, using foam tape on two cats and the butterfly wings

Go to the Stampendous Blog for more Laurel Burch samples.

Happy Creating,
Louise