 |
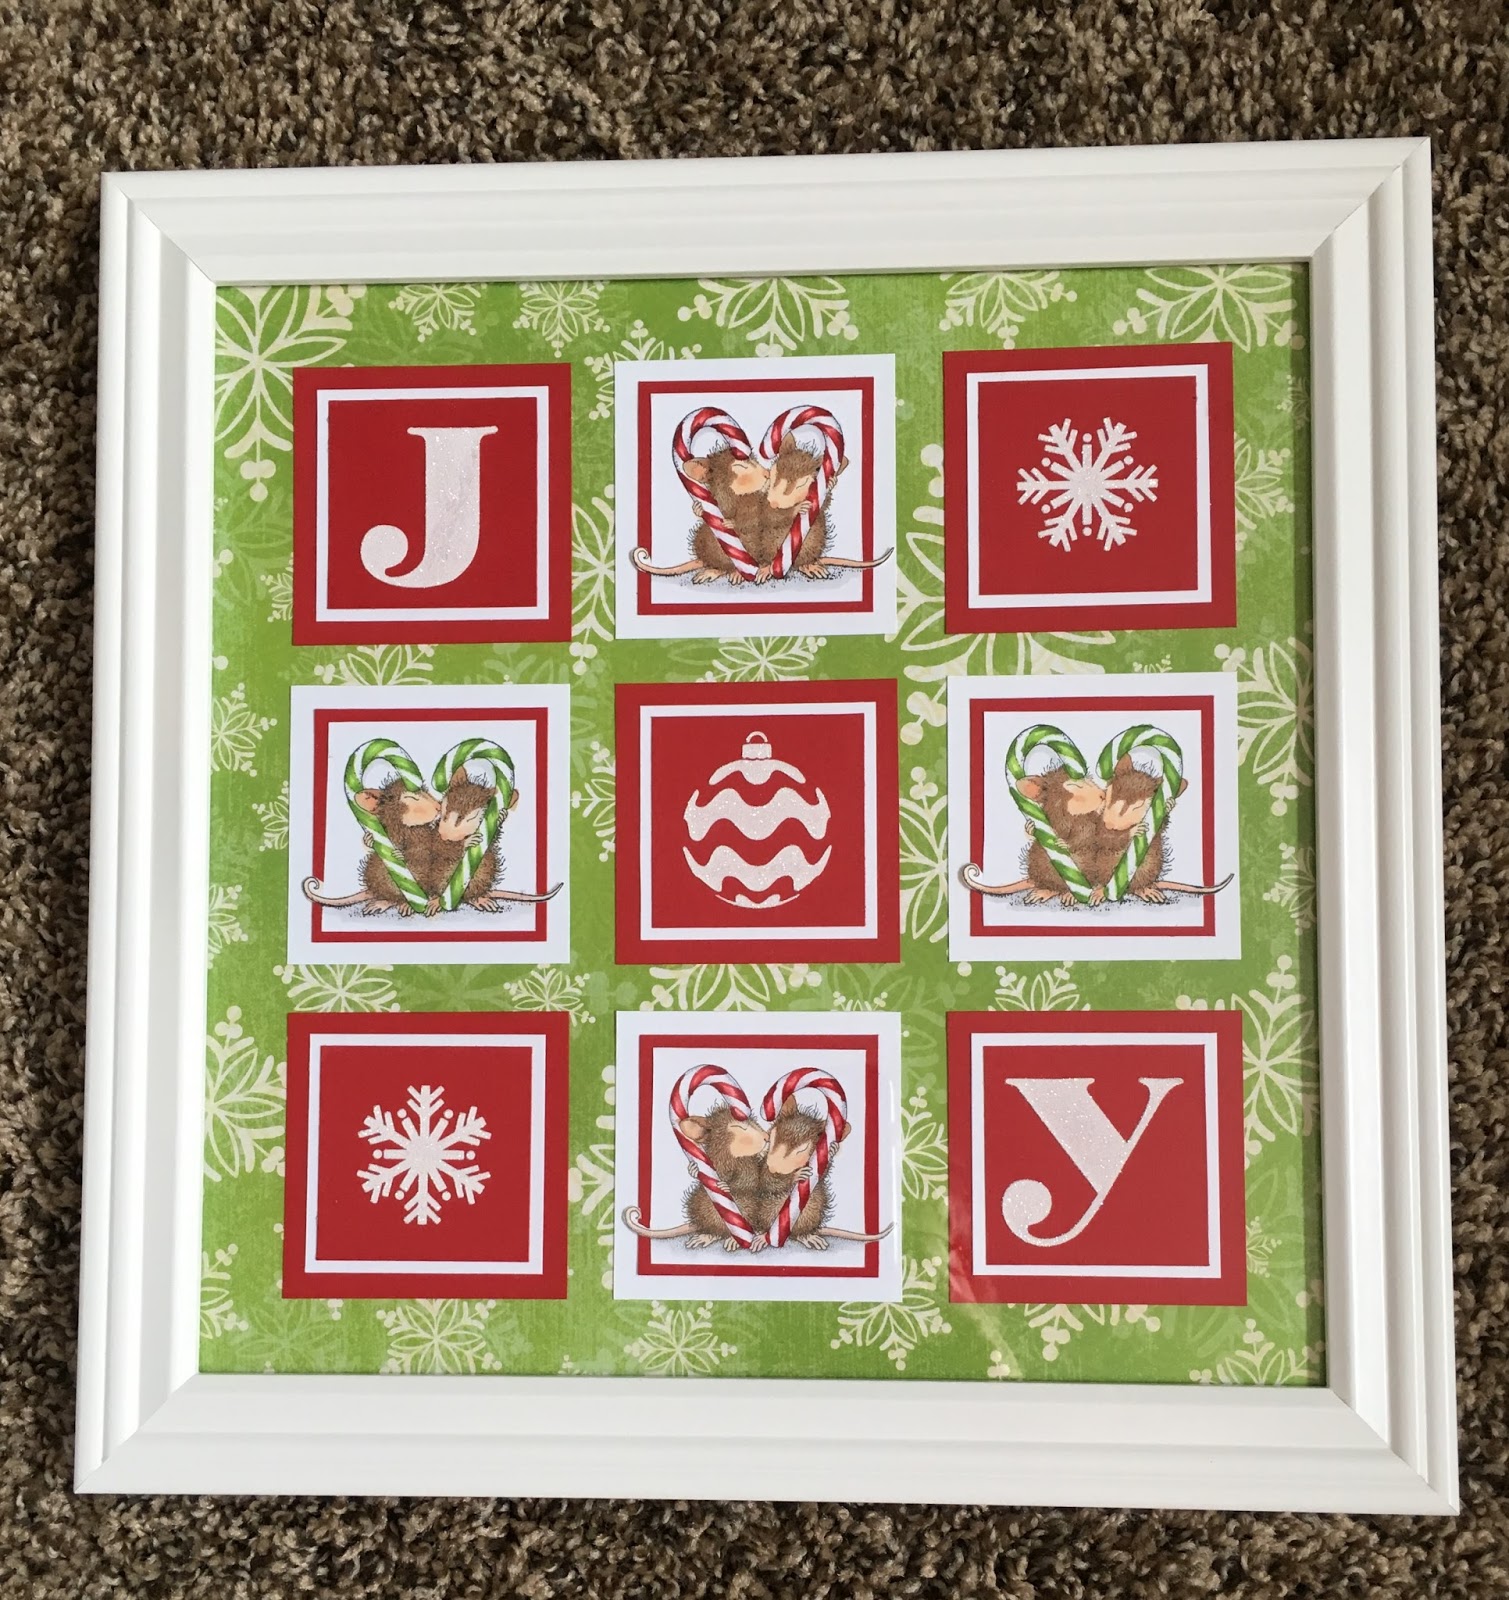
| "JOY!" |
Stampendous:HMCM14 Cling Candy Cane Kiss Stamp
Acrylic Handle
GL220U Crystal Glitter Multi Ultra Fine
MPW811 Mixed Media White Paper
MEM01 Memento™ Tuxedo Black Ink by Tsukineko®
Dreamweaver:
DWLL510 Joy Ornament Stencil
DWLS26 Snowflake Stencil
DWDGWP Glossy White Embossing Paste
DWDPK Dreamweaver Palette Knife
DWLM2010 Paste Spreader
Plus:
Red Cardstock
Graphic 45 HoHoHo 4500988
Copic Markers - R30, R27, R39, YG01, YG03, YG05, YG17, E51, E95, E31, E33, C1, B60
Removable tape
Grid Ruler
Pencil
Scissors
Instructions:
Step 1: Red Cardstock - 5 pieces 3" x 3", 4 pieces 2 1/2" x 2 1/2", 5 pieces 2 1/4" x 2 1/4"
Step 2: White cardstock 4 pieces 3" x 3", 5 pieces 2 1/2" x 2 1/2", 4 pieces 2 1/4" x 3"
Step 3: Use removable tape to tape off the "O" and "Y" on the Joy Ornament stencil, tape the "J" to the center of one of the 2 1/4" x 2 1/4" pieces of red cardstock
Step 4: Use a palette knife and paste spreader to apply a coat of Glossy White Embossing Paste over the image, remove stencil and place in water for cleaning, sprinkle wet paste with Crystal glitter, tap off extra, let paste dry
Step 5: Repeat steps 3 and 4 for the "O" and "Y" taping off the other letters
Step 6: Use removable tape to tape the Snowflake Stencil to one of the 2 1/4" x 2 1/4" pieces of red cardstock
Step 7: Use a palette knife and paste spreader to apply a coat of Glossy White Embossing Paste over the image, remove stencil and place in water for cleaning, sprinkle wet paste with Crystal glitter, tap off extra, let paste dry
Step 8: Repeat steps 6 and 7 for the second snowflake
Step 9: Use Memento Tuxedo Black to stamp the Candy Cane Kiss image 4 times on 2 1/4" x 2 1/4" pieces of white, color with Copic Markers
Step 10: Use a centering ruler across each image to mark 1 1/8" to each side of center, trim each side for a finished size of 2 1/4" x 2 1/4" trimming around the tails
Step 11: Layer the "JOY" letters and the 2 snowflakes onto white mats 2 1/2" x 2 1/2", then on to the 3" x 3" red
Step 12: Layer the Candy Cane Kiss images onto red 2 1/2" x 2 1/2" mats, then on the 3" x 3" white
Step 13: Use a grid ruler to help line up and adhere the squares 1" in from the top and sides and 1/2" between each letter on a 12" x 12" piece of HoHoHo cardstock, leave a 1/2" between the rows
Step 14: Frame in a white 12" x 12" frame
Hope your holiday preparations are going well! Stop over at the Stampendous Blog to see more creations!
Happy Creating,
3 comments:
Your card show so much joy! Great composition!
LOVE the Tic-tac-toe JOY! Very pretty and festive!! TFS!
This is beautiful! I will have to check my stamps and see if I need to get these.
Post a Comment