Showing posts with label SSC1251 Bible Promises Perfectly Clear Stamps. Show all posts

Friday, May 5, 2017

Daffodil Glory!

Have you made your Mother's Day card yet?  There's only one more week, you better get busy. The Stampendous Design Team has been posting some great ideas all week for our "Celebrate Mom!" theme to help inspire you! I am so lucky to be on this Design Team, we receive lots of free products to create wonderful samples for Stampendous.

Today I am sharing a card with the beautiful Long Daffodils Stencil (DWLL428). Daffodils represent Spring, in my mind, and Spring is my favorite season.


Supplies:

Stampendous:
SSC1251 Bible Promises Perfectly Clear Stamps
MG07 Sunflower Micro Glitter
GL220U Crystal Glitter
MPW811 Multi Media White Paper

Dreamweaver:
DWLL428 Long Daffodils Stencil
DWLL332 Picasso Stencil
DWDEPT Translucent Embossing Paste
DWDPK Dreamweaver Palette Knife
DWLM2010 Paste Spreader
DWLL332 Picasso Stencil
DWGHB-6 1/4" Brush #6 Gold Handle

Plus: 
Green and Yellow Cardstock
Lime Green Striped Paper
Brilliance Ink P. Thyme, Sunflower Yellow, P. Orange
Copic Markers Y08
Removable Tape
Scrapbook Adhesives White Foam Squares

Instructions:
Step 1:  Fold a 5 1/2" x 8 1/2" piece of green cardstock in half to form an A2 card
Step 2: Tape the stencil on a 2" x 5 1/2" piece of white paper with removable tape
Step 3:  Use 1/4" stencil brushes to apply ink to the design, use the Picasso to help keep colors clean, remove the stencil, clean and dry the stencil
Step 4:  Tape the clean and dry stencil back over the stenciled design
Step 5:  Use a palette knife to apply Translucent Embossing Paste over the design, remove stencil and place in water for cleaning later, sprinkle the wet paste with Crystal Glitter, tap off extra, let paste dry
Step 6: Cut a 4" x 5 1/2" piece of Lime green striped paper, use the swirl stamp from the Bible Promises set to stamp all over the background with P. Thyme ink, adhere to the card front
Step 7: Cut a 3/4" x 4" piece of green paper, adhere near the bottom of the card front
Step 8:  When the paste is dry, trim the white piece to 1 3/4" x 5 1/4", adhere to a 2" x 5 1/2" piece of yellow cardstock, adhere to the card front
Step 9: Cover two white foam square with Sunflower Micro Glitter, use the Y08 marker around the edges, adhere to the card front on the green strip
For a complete list of today's designers, go to the   Stampendous Blog

Happy Creating,
Louise

Wednesday, March 1, 2017

Succulents and Cactus Fun!

Welcome to March! This year is already speeding by, although that means Spring will be here soon! Last week we had three days in the 70's! Of course, Saturday temps in the 40's quickly brought us back to reality. 

This week the Stampendous Design Team members are sharing projects featuring stencils. Stampendous has a fabulous line of stencils from Dreamweaver of course, but, in addition, Fran has designed some new stencils.  The lovely Succulent Metal Stencil (FMS4055) is perfect for any occassion.  Add a little butterfly for a great finishing touch!

Succulent Beauties!
Supplies:

Stampendous:
FMS4055 Succulent Metal Stencil
SSC1250 Bible Journal Perfectly Clear Stamps
SSC1251 Bible Promises Perfectly Clear Stamps
MPW811 Mixed Media White Paper
Acrylic Handle
MEM01 Memento™ Tuxedo Black Ink by Tsukineko®

Dreamweaver:
DWLL332 Picasso Stencil
DWDEP Regular Embossing Paste
DWDPK Dreamweaver Palette Knife
DWLM2010 Paste Spreader
DWGHB-6 1/4" Brush #6 Gold Handle Brush

Plus:
My Color Cardstock Sky, Grasshopper
Graphic45 Versailles 4501131
Distress Inks - old paper, bundled sage, forest moss, pine needles, tumbled glass, mermaid lagoon
Removable Tape
Fine Line Black Pen

Instructions:
Step 1:  Fold a 7" x 10" piece of Sky cardstock in half to form an A7 card
Step 2: Tape the Succulent stencil to a 4" x 5 1/4" piece of  white paper with removable tape
Step 3: Use a palette knife and paste spreader to apply Regular Embossing Paste over the design, remove stencil and place in water for cleaning later, let paste dry
Step 4:  Tape the clean dry stencil back over the dry paste with removable tape, use 1/4" stencil brushes and the Picasso tool to apply inks to the dry paste
Step 5:  Cut a 4 1/4" x 5 1/2" piece of Grasshopper, adhere Succulents to the green mat
Step 6: Cut a 4 3/4" x 6 3/4" piece of  the Graphic45 paper, use the small leaf stamp from the Bible Promises set and old paper ink to randomly stamp the leaves over the blue paper, use the blue stencil brush to brush mermaid lagoon ink along all the edges, adhere to the card front, adhere the Succulent layer on the blue layer
Step 7:  Stamp the small butterfly from the Bible Journal set on white paper with Memento Tuxedo Black ink, color the butterfly with the Distress Inks, cut out, adhere to the Succulent layer, use a fine black pen to add antennae

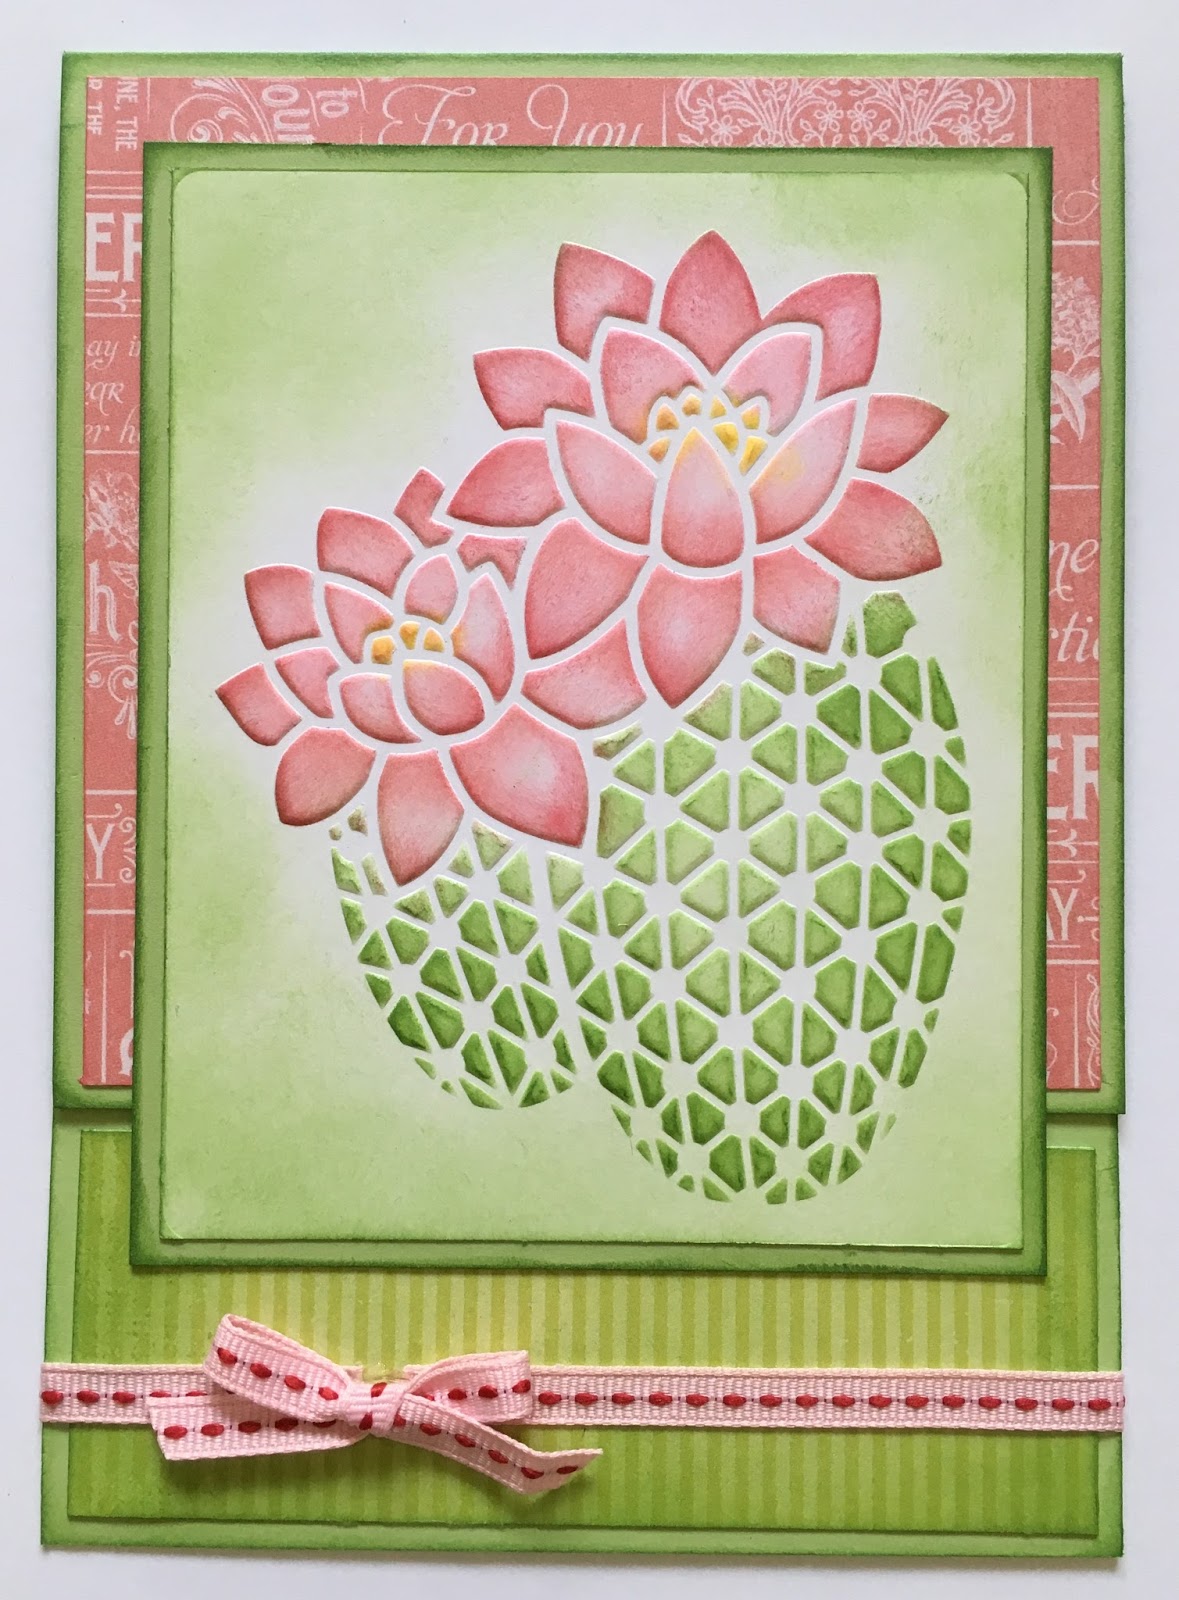
But wait! BONUS PROJECT! We have another beauty that Fran designed called Cactus Flower (FMS4054). It makes a fabulous card too.

Cactus Fun!
Stampendous:
FMS4054 Cactus Flower Metal Stencil
MPW811 Mixed Media White Paper

Dreamweaver:
DWNHB-12 1/2" Brush #12 Natural Handle
DWGHB-6 1/4" Brush #6 Gold Handle Brush

Plus:
Light Green Cardstock
Graphic45 Cardstock June Flourish 4501040
Green Striped Cardstock
Brilliance Ink - Sunflower Yellow, P. Coral, Rocket Red, P. Thyme
Rubber Embossing Mat
Die Cut Machine
Removable Tape
Creative Impressions 70913 1/4" Pink with Red Stitch Ribbon
Fabri-Tac

Instructions:
Step 1:  Score a 5" x 12" piece of paper at 5" from one end, fold at score line to form a top flap A7 card
Step 2: Use the Rubber Embossing Mat and die cut machine to dry emboss a 4" x 5" piece of white using the Cactus Flower Metal Stencil
Step 3: With the stencil in place over the embossed design, use a 1/4" and 1/2" stencil brush es to add color to the design, remove the stencil and brush green ink around the edges
Step 4:  Cut a 4 3/4" x 4 3/4" piece of the Graphi45 paper, edge with the Coral ink and adhere to the front flap of the card
Step 5:  Cut a 1 3/4" x 4 3/4" piece of the Green Striped paper and brush green ink around the edge of the paper, adhere to the bottom of the card front
Step 6: Brush green ink all around the outer edges of the card
Step 7:  Cut a 4 1/4" x 5 1/2" piece of green paper, brush edge with green ink, adhere the Cactus Flower image to the green mat, then to the flap part of the card front
Step 8: Wrap a piece of the ribbon around the bottom part of the card and attach with Fabri-Tac
Step 9:  Tie a small bow and adhere to the ribbon using Fabri-Tac

Today's designers:

Stampendous Blog

Kristine Reynolds

Jamie Martin

Katy Leitch

Louise Healy


Happy Creating,
Louise