Thursday, April 18, 2013

Rain, Rain Go Away!

I know that's not really our challenge theme this month, but that's how I feel right now. I need sunshine soon! I am grateful that it's not snow, but enough already! It seems that our Dreamweaver Stencils April challenge of Mists, Drizzles and Showers has been an accurate forecast of our weather.
To go along with the rainy weather, I am showing yet another idea for the the Umbrella stencil (LG737), this time using Zentangle. Enjoy!


If you haven't tried using your stencils with this fun technique, you don't know what you're missing! Stencils are the perfect starting point because they provide natural divisions for your various Zentangle patterns. Check for classes in your area, you'll have fun, I promise! I use Sakura Micron pens to do mine.

Be sure to stop by the rest of the teams' blogs for more inspiration.


Happy Creating,
Louise

Thursday, April 11, 2013

Mists, Drizzles and Showers!

The April Dreamweaver Stencils challenge of "Mists, Drizzles & Showers!" perfectly describes the weather outside as I prepare this posting. It is a gray, gloomy day here, though I'm not complaining because our relatives in MN are getting more snow! I'll take a rainy spring day instead, the daffodils seem to be liking it. 
This week I am sharing a card that I made for Lynell a couple of years ago. I have always loved how it turned out, so I hope you don't mind seeing it again, it is perfect for this challenge.

LJ905, LJ908, LG738
This uses three great stencils and is a bright and cheery card, perfect for lifting someones spirits when you include a personal note inside! Here are the steps I used:
  • Use a light box or die cut machine to emboss the Umbrella bkg (LJ908) stencil on white cardstock
  • Leave the stencil in place over the embossed image and use 1/4" stencil brushes to add various colors to the umbrellas (tape the stencil in place with removable tape)
  • Clean off the Umbrella stencil and place back over the colored umbrellas, taping it down
  • Tape the Rain stencil (LJ905) over the umbrellas
  • Use a Palette Knife and Paste Spreader to apply a coat of Translucent Embossing Paste over the Rain stencil
  • Remove and clean stencil, let paste dry
  • Tape off the word you want from the Rain words stencil (LG738) and use a 1/4" stencil brush to stencil the words on white cardstock
  • Remove the stencil and add a little of the same color around the edge of the words
  • Mount onto coordinating cardstocks
  • Finish the whole thing off with some fun ribbon flowers.
We are happy to welcome back our guest designer Alison Heikkila. This weeks designers are:


Happy Creating,
Louise

Thursday, April 4, 2013

Mists, Drizzles and Showers!

Happy April everyone. You knew our Dreamweaver Challenge during April had to have something to do with showers, right! Hopefully April will offer a lot of sunshine and warm weather too, but we definitely need some April showers for the May flowers.

We hope you will create something for our April challenge and link it on the DREAM it UP! blog using the Mr. Linky tool, or email a picture of it to lynell@dreamweaverstencils.com and she will post it for you. You might win a great prize!

My first post for April, shoos the showers away! I really need some sunshine and warmth for a few days at least.
Umbrella, Rain, and Rain Words
LG737, LJ905, LG738

This card is really very simple:
  • Tape the Umbrella stencil (LG737) to white cardstock with removable tape
  • Use a palette knife and paste spreader to apply Glossy Red Embossing Paste (DGRP)
  • Remove the stencil and place in water for cleaning
  • Let the paste dry
  • Place the clean dry stencil face down on back of decorative paper and trace the umbrella openings with a pen or pencil
  • Cut out the umbrella pieces just outside the outline (so the line still shows)
  • When the paste is dry, use liquid glue to attach the paper pieces to the appropriate opening of the pasted umbrella
  • Lay the Rain stencil (LJ905) over the umbrella image and use a 1/4" stencil brush and light blue ink to stencil some raindrops in the background
  • Use a clear glitter pen to add a little sparkle to the raindrops
  • Stencil the "Rain, Rain, Go Away" words from the Rain Words stencil (LG738) on white cardstock using a 1/4" stencil brush and red ink
  • Mount in layers using coordinating cardstock
This week our new team members join our weekly postings AND we have a guest designer too! Here are their links so you can check out their great creations.


Happy Creating,
Louise

Thursday, March 28, 2013

A bloomin' Spring!

It's hard to believe that we're already on our last posting for the March Dreamweaver Stencil challenge of "A bloomin' Spring!". It's still not quite Spring here, but luckily we dodged the last snow storm that blanketed southern Illinois! My daughter is supposed to be playing golf this Friday in their first invitational of the Spring season, we'll see...
I hope you had a chance to "meet" our new team members on the DREAM it UP! blog last week. We are excited to have them join the Dream Team and look forward to their posts starting next week.
Sure signs of Spring are the beautiful bulbs that bloom while there is still a nip in the air. While they might be blooming a  little later this year, I still look forward to them and the fresh swath of color they provide. Tulips are some of my favorites, though I've stopped planting them now that our neighborhood is mature enough to have squirrels (you gardeners out there will understand!). I swear they watch you plant them, then dig them up and eat them as soon as you turn your back! Oh well, I guess I'll have to be satisfied with coloring my own tulips. Here's what I created this week.

LL444 - Mack tall tulips

This is the beautiful Mack tall tulips stencil (LL444) from Dreamweaver Stencils. I kept it clean and simple with crisp lines and colors, just like Spring!
  • Tape the stencil to white cardstock with removable tape
  • Apply inks using small stencil brushes (use the Picasso (LL332) to keep your colors in place)
  • Remove and clean your stencil
  • Mount on "spring-colored" paper and add a beautiful ribbon
The rest of the team have more springtime cards to share with you, so take some time to "smell the flowers!" 

Only a few days left for you to join our March challenge. Just link your blog on the DREAM it UP! blog using the Mr. Linky tool, or email a picture of your creation to lynell@dreamweaverstencils.com. Join us in April for our new Dreamweaver challenge!

Happy Creating,
Louise

Thursday, March 21, 2013

A Bloomin' Spring!

How I wish I could say it felt like Spring today, but I can't! Even though the sun has been shining brightly the last two days, it has been very cold and very windy here in northern Illinois.  My daffodils continue to bravely grow a little taller each week and hopefully will be in bloom for Easter (oh my! I haven't even started Easter cards!)
This week the Dreamweaver Stencils Design Team welcomes our new members who will start posting with us in April. Welcome aboard everyone, we can hardly wait to see what you will share with us!
The cards I am sharing with you this week will be featured in my upcoming class in Marshfield, WI at Stampin' N Scrapin' Fun on April 4th.  Give Jean a call to sign up if you're in the area, we are going to have a great time! We'll be creating three cards using three different Dreamweaver techniques, and the Long stem iris (LL374)  stencil is yours to take home after class.


Want to learn more about how we create with Dreamweaver products? Give your local craft store a call to see if they offer Dreamweaver classes. Here's a link of Where to Buy locations. Your local store doesn't carry Dreamweaver? Tell them you NEED them to carry this fun line, or check out the online locations too.
As usual, the rest of the team has more beautiful creations for you, so be sure to stop over at their blogs to see what's new this week.

Happy Creating,
Louise

Thursday, March 14, 2013

A Bloomin' Spring!

Welcome back to week 2 of the March Dreamweaver Stencils design challenge. This month our challenge is "A Bloomin' Spring!", which naturally leads to spring flowers popping up and birds returning for the season. We would love to have you join our fun. Make your own creation and post it on your site then link it on the DREAM it UP! blog using the Mr. Linky tool.  Don't have a way to post your creation? Not a problem, just email a photo of your card or project to lynell@dreamweaverstencils.com and she will post it for you. You could win a great prize!
This week I will show you the Faux Tile technique. It's fun and can be done with virtually any stencil. Here we go:
Place the Diamond Grid (LJ882) stencil on the large platform
of your die cut machine
Lightly mist your paper with water or alcohol and tape over the grid

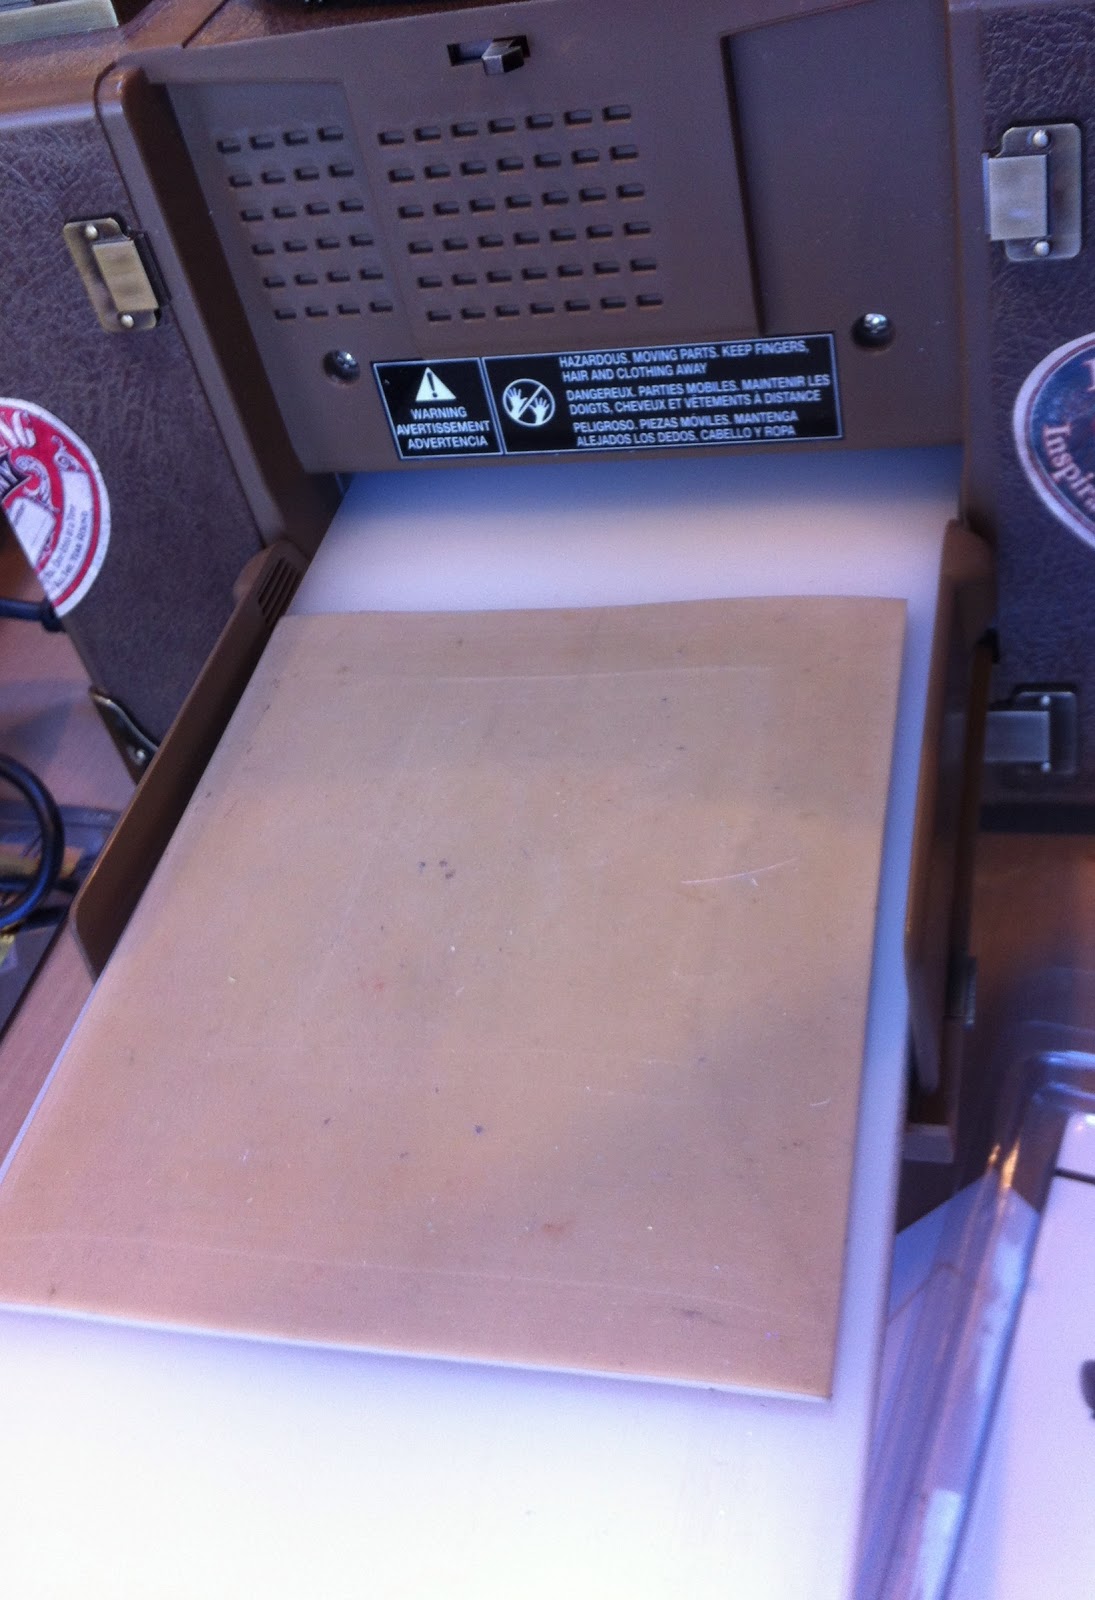
Place the rubber embossing mat over the grid and paper

Place two clear cutting mats over the grid and paper and run thru the machine

Here's the back of the embossed grid

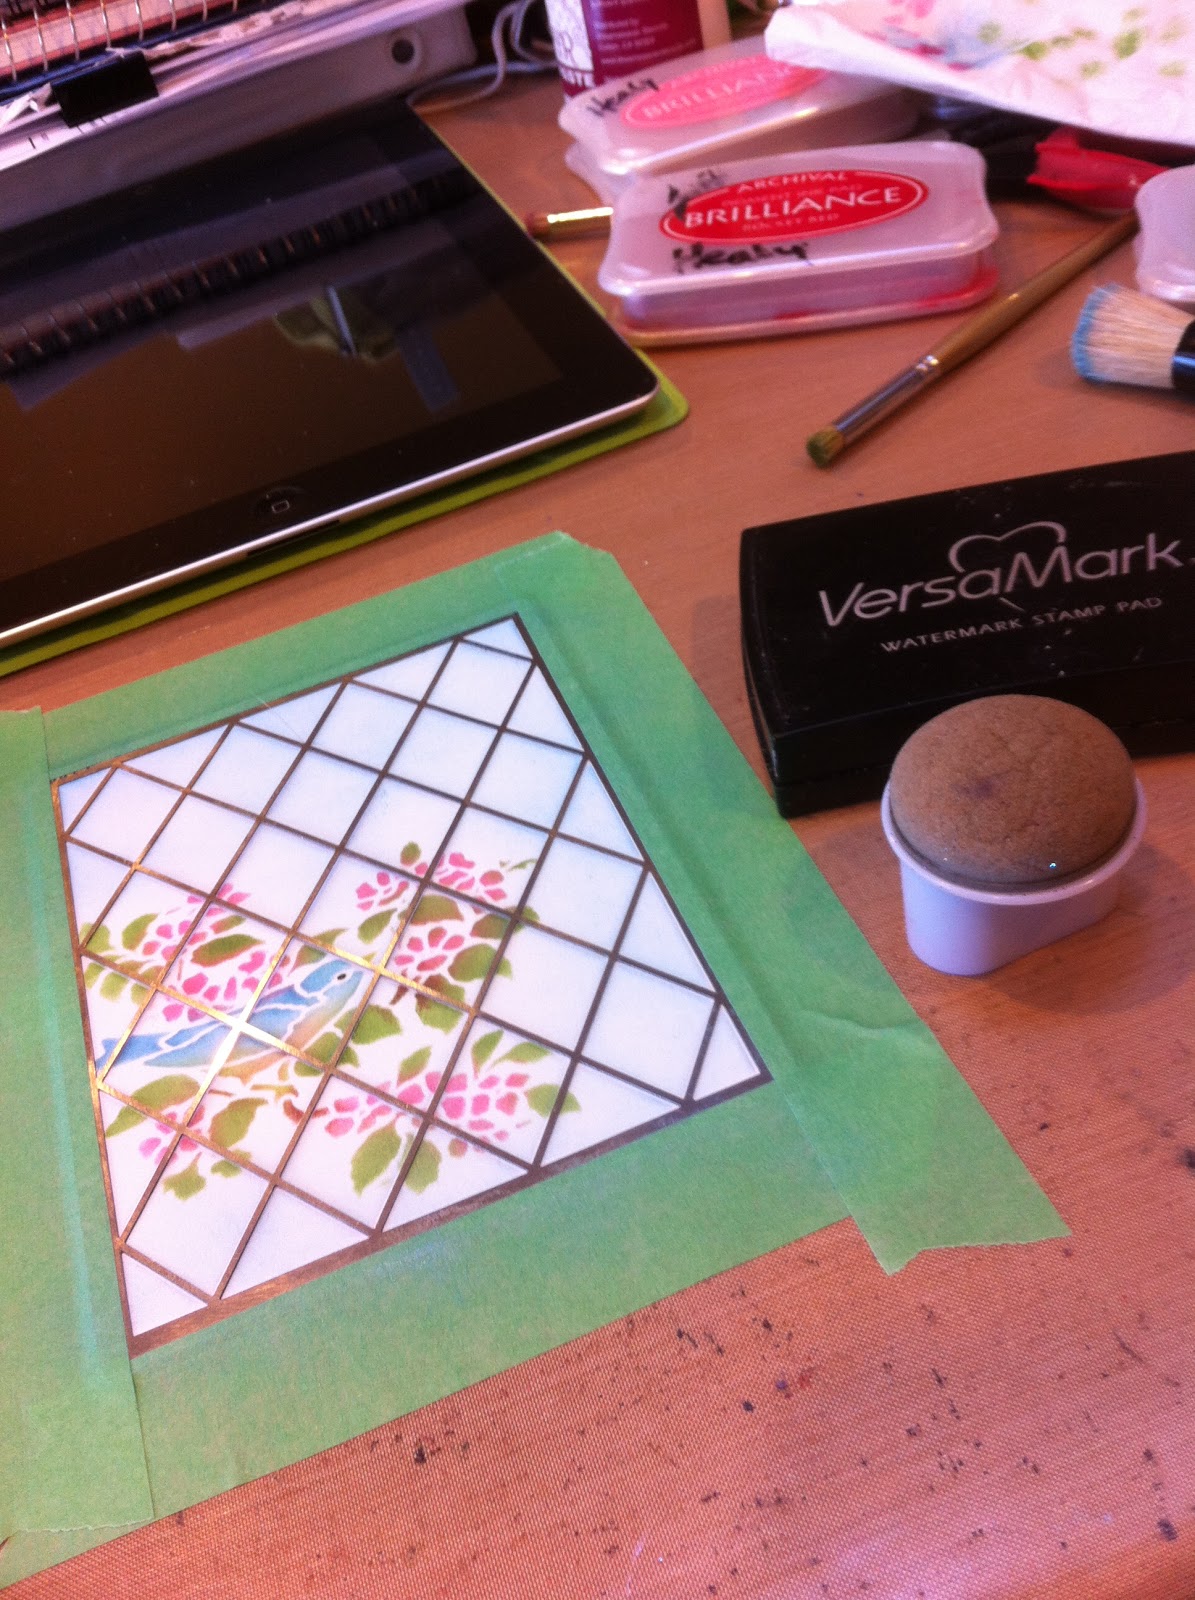
Turn the embossed image to the front and tape the grid stencil back in place
 
Use small pieces of removable tape to cover the frame portion of the Birds & blossoms (LG646) stencils

Tape the bird to the lower left side of the grid stencil
Use small stencil brushes to add color to the bird design
Remove the Bird & blossoms stencil


Use a larger stencil brush to add some light blue in the background


Use a finger dabber to add VersaMark ink over the entire grid

Remove the grid stencil and cover with Clear Embossing Powder,
heat to set

Return the grid stencil, add another coat of VersaMark and Clear Embossing Powder,
heat to set

Mount into a beautiful card and add some gorgeous ribbon from May Arts!
 
Close up of the tile
I hope you enjoyed learning about this great technique. The rest of the team have more great creations for you, so please check out their blogs too!

Happy Creating,
Louise

Thursday, March 7, 2013

A Bloomin' Spring!

Welcome to the Dreamweaver Stencils March Designer Challenge! Our theme this month is "A Bloomin' Spring!" so you'll probably be seeing alot of our beautiful floral stencils being displayed in this fun challenge. It doesn't look much like spring here in northern Illinois right now, we have about 4-5" of snow on the ground and are supposed to be getting another 5-6" this week! March came in like a lion and I sure hope it goes out like a lamb!
As soon as I heard the theme of this month's challenge, I knew what stencil I would use first, the beautiful Long Daffodils stencil (LL428). My daffodils were actually starting to pop through last week, now they are covered with a blanket of snow! But, a few more warm days and they'll be fighting their way through again.  Sadly my creation for this week is serving double duty, for this challenge and as a Sympathy card for my dear sister-in-law on the loss of her husband of 35 years. The daffodils give that perfect feel of comfort and hope of new life so I decided to change my card from a "spring" card to a "comfort" card. I think it worked out very well.

Long Daffodils - LL428

Here are the simple steps I used:
  • Cut cream colored linen cardstock (4 1/4" x 11") and score in half to create an A2 size card that opens at the bottom
  • Tape the stencil to the left side of the front of the card with removable tape
  • Place the card, stencil side down on a light box, and use a stylus to dry emboss the image
  • Move the stencil over to the right and down a little to emboss a second image
  • Place the stencil back over the first embossed image and use small stencil brushes to stencil on color
  • Repeat with the second image
  • Tape off the word "comfort" from the Comfort combo (LG696) stencil and place the word in the upper right corner of the card
  • Use a small stencil brush to stencil on brown ink
  • Remove and clean the stencil
  • Use a 3/4" or 1" brush to rouge a lighter brown ink around the edges
  • Tie a yellow ribbon around the front portion of the card and tie a bow
For the inside:

  • Place the Long Daffodils stencil along the left edge and stencil on color with small stencil brushes
  • Tape off the "With Deepest Sympathy" part of the Comfort combo stencil and place it along the right side of the card
  • Stencil brown ink through the words
  • Rouge some light brown ink at the base of the flowers
  • Attach the card to a small yellow mat (4 3/8" x 5 5/8") then to an A6 size piece of orange cardstock (4 3/4" x 6")
Please be sure to stop over at the rest of the team blogs for more wonderful ideas on using these beautiful stencils.
Happy Creating,
Louise