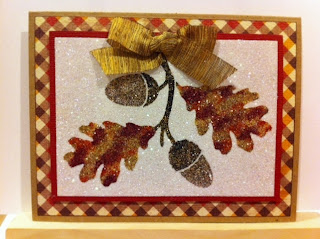
This has been a busy month for the Dreamweaver Stencils design team! We have been featuring the beautiful glitter from Art Glitter in our Awesome in Autumn creations and spent a week creating fall designs combining our stencils with the fabulous stamps from Quietfire Design.
Follow the trail of bling on the Art Glitter blog, and the Dream It Up! blog. Play along with the monthly challenge of "Awesome in Autumn" and link your creations to the linkytool on the Dream It Up! Thursday posts for a chance to win some stupendous stencils and glamorous glitter! As if that wasn't cool enough, Art Glitter is offering a 20% discount this month if you use the code DW20 and...
Stencil with Style is also offering a 20% discount this month if you use the code SWS20!
Today I am sharing two sparkly goodies that I created a while ago, but I just love them and they show two techniques for you!
First is the beautiful Maple branch (LJ906) stencil that you may have seen on some of the other blogs this month. This was done in the double glitter technique using Art Glitter Rock Moss Microfine glitter in all the stencil openings, then while the stencil was still in place, I used stencil brushes and ink pads to color the image. The microfine glitter is pretty easy to stencil over. The background was covered with Crystal Ultrafine glitter.
.JPG) |
| LJ906 - Maple branch in the Double Glitter Technique |
The second card was created by first paste embossing the Rooster stencil (LG732) with Metallic Gold Embossing Paste on black cardstock, removing the stencil (place in water for cleaning later), and sprinkling the whole image with True Red Ultrafine Opaque glitter, tap off the excess glitter and let the image dry thoroughly. When dry, use an x-acto knife to scrape away the glitter in some of the areas to expose the gold paste again. Cut out the rooster and mount him on decorative papers.
.JPG) |
| LG732 - Rooster in gold paste with True Red glitter, then scraped |
I hope you have enjoyed our month of Awesome in Autumn and will consider joining our fun! Now head on over to the other team member blogs to check out their creations!
Happy Creating,
Louise


.JPG)


.JPG)

.JPG)