Showing posts with label Taupe Color Fragments. Show all posts

Thursday, March 19, 2015

Marching into Spring Week 3!

Ready for fresh air, sunshine, new leaves, and flowers blooming? Well, the Dream Team is right there with you! Our challenge for the month of March is...coincidentally...Marching into Spring. Per usual, we'd love to have you play along with us, and link your own creations to theInlinkz tool on the Dream It Up! blog, or at the bottom of this post. Play as many times as you'd like. Those of you who work Dreamweaver and/or Stampendous products into your projects receive bonus points, but everyone has an opportunity to be the winner who receives the stencil of their choice.

Here's my hint of Spring:

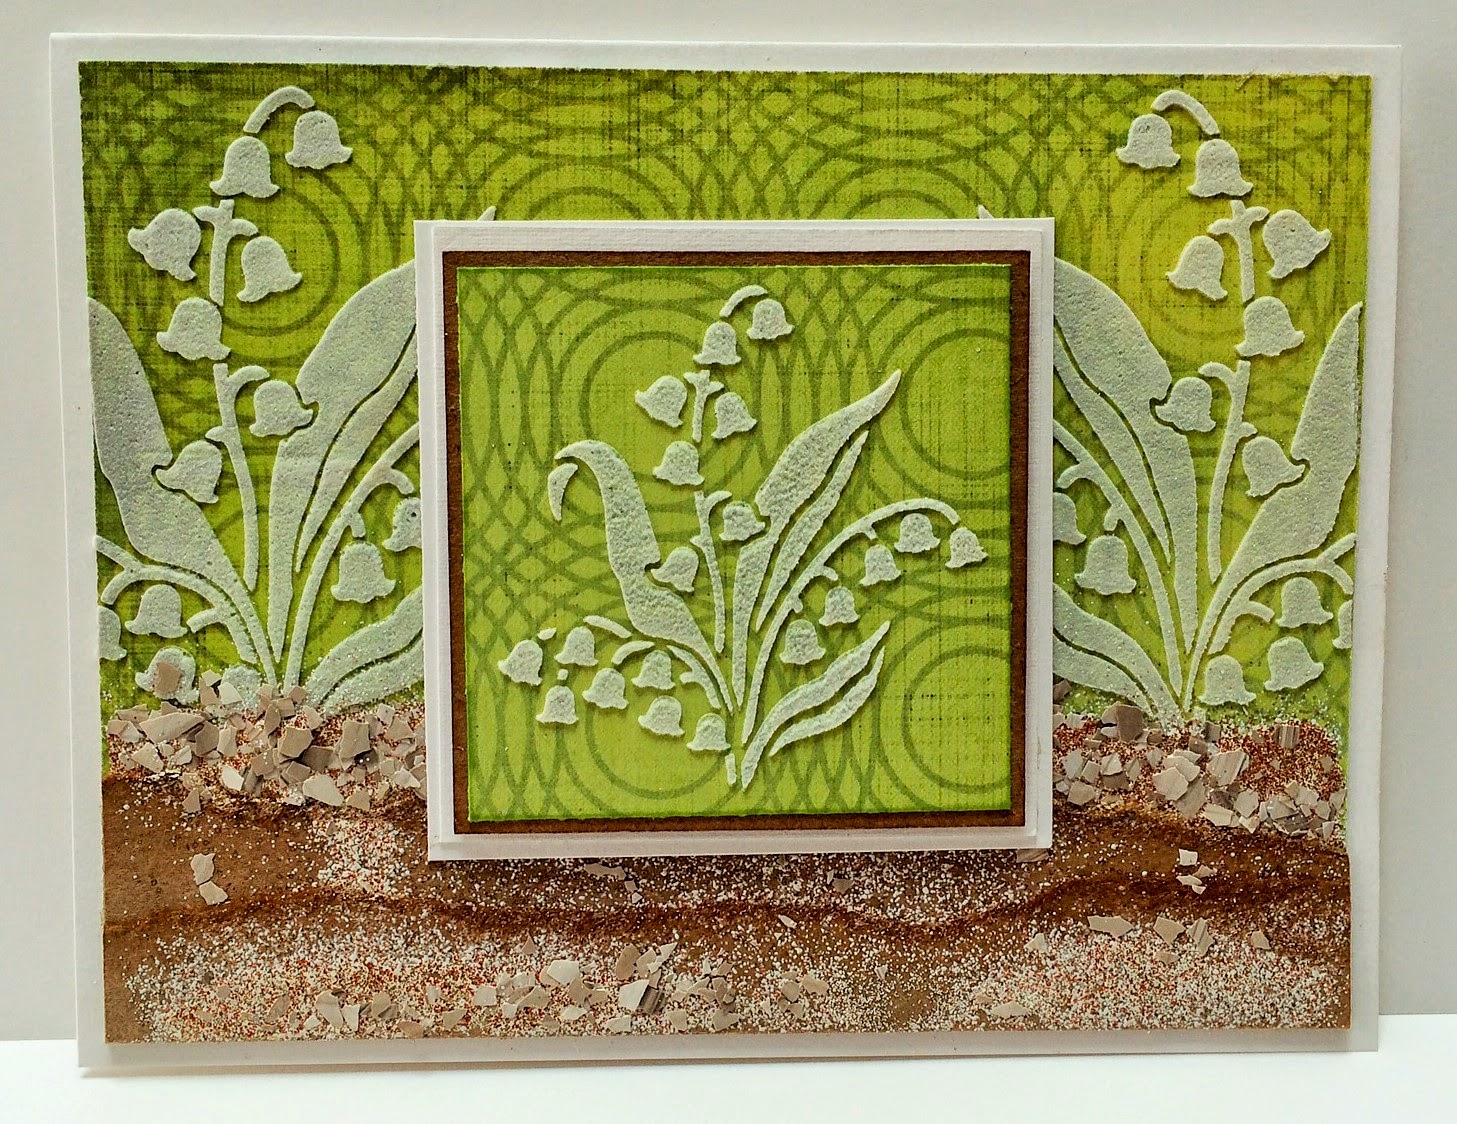
Lily o'valley (LL370 & LM140)
I just love Lily of the valley plants. They are a sure sign that spring is in full swing. My poor little ones are still deep under a blanket of snow, but once that's gone, it's amazing how fast they will grow. This card was so easy.

  • Simply paste emboss the larger Lily o'valley (LL370) stencil towards one side of some decorative cardstock with Regular Embossing Paste
  • Remove and clean the stencil, dry it well
  • Turn the stencil over and paste it on the other corner of the cardstock
  • Set that piece aside to dry
  • Paste the smaller version (LM140) on a matching square of decorative cardstock and let that dry too
  • Tear a couple of layers of kraft colored cardstock, rouge the torn edge with some brown ink and layer them along the bottom of the large images
  • Sprinkle some Stampendous Golden Sand Embossing Powder and some Taupe fragents across the kraft cardstock
  • Heat from below to set the powder and fragments, it really looks like a garden bed!
  • Layer the larger images on a white card
  • Layer the smaller image on some kraft, then use foam tape to add it to a layer of white
Welcome Spring! (in a couple of days anyway!)
A parting thought...I was thinking about going back and adding a little Crystal glitter or Stardust pen to the "bells" of the flowers. What do you think? Should I or shouldn't I?
The "A" team would love to share their interpretations of this theme:

Louise Healy


Happy Creating,
Louise

Saturday, April 14, 2012

Dreamweaver Stampendous Blog Hop Day 6!


All of this week the Dreamweaver Stencils' Dream Team and the Stampendous Design Teams have been providing some "Dream-pendous" inspiration for you, with multiple opportunities to win some fabulous prizes from both companies. Each day this week, you were directed from both the Stampendous Impressions' blog or the Dream It Up! blog to the players du jourfor your oohing and aaahing pleasure. Everyone is playing today for our final hop for the week. This is your opportunity to see how to mix and mingle your creativity...if you are a stenciler, you will be fascinated at combining stamps with your first love. If you are a stamper, you will be wowed at how stencils can add to your impressions.


Petals Background - LJ899
Cling Hobby Horse - CRQ159
Mother's Love - SSC1146
Here's another stamp that my fellow Dream Team Member, Pam Hornschu thought I'd love, and I do!! The Dreamweaver Stencils Petals Background (LJ899) stencil seemed like just the right amount of topsy turvy for this happy little guy. I ran the stencil and a piece of kraft cardstock through my Big Shot. With the stencil still in place over the embossed design, I used a 3/4" stencil brush to add Distress Ink Gathered Twigs over the image. Trim up to the edge of the design and run the ink pad along the edge. Layer the embossed piece onto the front of a kraft card. Stamp the Hobby Horse with Memento Tuxedo Black ink on smooth white cardstock. Color with COPIC markers. Swipe the edge of the image with VersaMark embossing ink and sprinkle the edge with Aged Silver Embossing Enamel from Stampendous, tap off excess powder and heat emboss. Lightly brush the white areas with the stencil brush and Gathered Twigs ink. Ink the  Happy Day (remember I snipped apart the Happy Mother's Day stamp from the Mother's Love set (SSC1146) on Thursday so now I can combine the words however I want!), and stamp on white cardstock. Trim close, brush edges and background with the Gathered Twigs. Layer onto a small piece of dark brown cardstock. Layer the boy onto a piece of white that was brushed with Gathered Twigs, then on dark brown. After the card is assembled, add glue near the bottom of the boy and sprinkle with Taupe Color Fragments from Stampendous.

Be sure to leave comments as you tour the blogs (with your email addy!) for a chance to win one of three combined sets of these Dreamweaver and Stampendous goodies:


*For shipping and handling purposes, USA/APO/FPO/Canada winners only.

Here are the Saturday players.
 
__._,_.___
I  hope you've enjoyed our creations this week, I know we have had a lot of fun combining products from these two great companies!

Happy Creating,
Louise