Showing posts with label Dreamweaver. Show all posts

Thursday, December 10, 2015

Christmas Carols!

Celebrate the Season is this week's theme on the Stampendous Design Team. To me, a major part of celebrating the season is listening to and singing Christmas Carols!  This beautiful French Horn from Dreamweaver reminds me of all the wonderful carols we hear throughout the season!


Christmas Music

Supplies
Stampendous
MG08 Lime Micro Glitter
EP113 Ruby Red Opaque Embossing Powder

Dreamweaver
DWLG676 French Horn Stencil
DWLG731 Holly Flourish Stencil
DWLL332 Picasso Stencil
DWDGP Gold Embossing Paste
DWDPK Dreamweaver Palette Knife
DWLM2010 Paste Spreader

Plus
1/4" Stencil Brushes
Brilliance Inks - Pearlescent Thyme, Rocket Red
May Arts Ribbon
Neenah Papers Classic Linen Cover 80# Red Pepper
Neenah Papers Classic Crest Cover Natural White 80#
Double-sided tape
Heat Embossing Tool

Instructions

Step 1:  Fold a 7" x 10" piece of Red cardstock in half to form an A7 card

Step 2:  Stencil the Holly Flourish image around a 4 3/4" x 6 3/4" piece of Natural cardstock using 1/4" stencil brushes and Brilliance ink, use the Picasso to keep colors clean

Step 3: Attach a piece of sheer gold May Arts Ribbon around the Holly Flourish layer, then attach that layer to the front of the card

Step 4:  Paste emboss the French Horn stencil on Natural cardstock (3 3/8" x 4 1/2") with Gold Embossing Paste using a Palette Knife and Paste Spreader, remove stencil and place in water for cleaning

Step 5:  While the paste is still wet, cut a straw at an angle and use it to carefully apply Lime Micro Glitte to the pasted holly leaves, and Ruby Red Embossing Powder to the berries, apply only a little at a time to prevent it from getting on the French Horn, don't try to tap off any extra yet, let paste dry

Step 6:  Tap off any extra glitter and powder, use a heat tool to set the powder, be careful not to heat too long

Step 7:  Tape the French Horn layer to a red mat (3 1/2" x 4 5/8"), then to the front of the card

Check out how my team members "Celebrate the Season"!


Louise Healy

Happy Creating,
Louise

Thursday, December 3, 2015

Angel Kisses

Welcome to Dreamweaver Thursday and our weekly theme of "Sugar Plum Wishes and Angel Kisses". The Stampendous Design Team has been busy this week sharing not only ideas for our weekly theme, but hopping with the folks at Patty Pop Ons too!  Be sure to check out all the different ideas!

Yesterday I shared a cute little House Mouse design for the Sugar Plum Wishes side of our theme. Today I showing you a beautiful stencil from Dreamweaver.  It's a simple, but elegant card using our Shadow Technique.


Stampendous:
SSC1231 Holiday Expressions Perfectly Clear Stamps™
SSH57 Jumbo Perfectly Clear™ Acrylic Handle
GM220U Crystal Ultra Fine glitter

Dreamweaver:
DWLJ871 Angel Stencil
DWDPP Pearlescent Embossing Paste
DWDPK Dreamweaver Palette Knife
DWLM2010 Paste Spreader
DWNHB-12 1/2" Brush #12 Natural Handle

Plus:
Cardstock by Bazzill Basics Paper®
Zip Dry™ Paper Glue by Beacon Adhesives
Neenah Papers Classic Crest Cover Solar White 80# 04701
VersaFine Majestic Blue
Double-sided tape
Foam tape

Instructions:

Step 1:  Fold a 7" x 10" piece of blue cardstock in half to form an A7 card


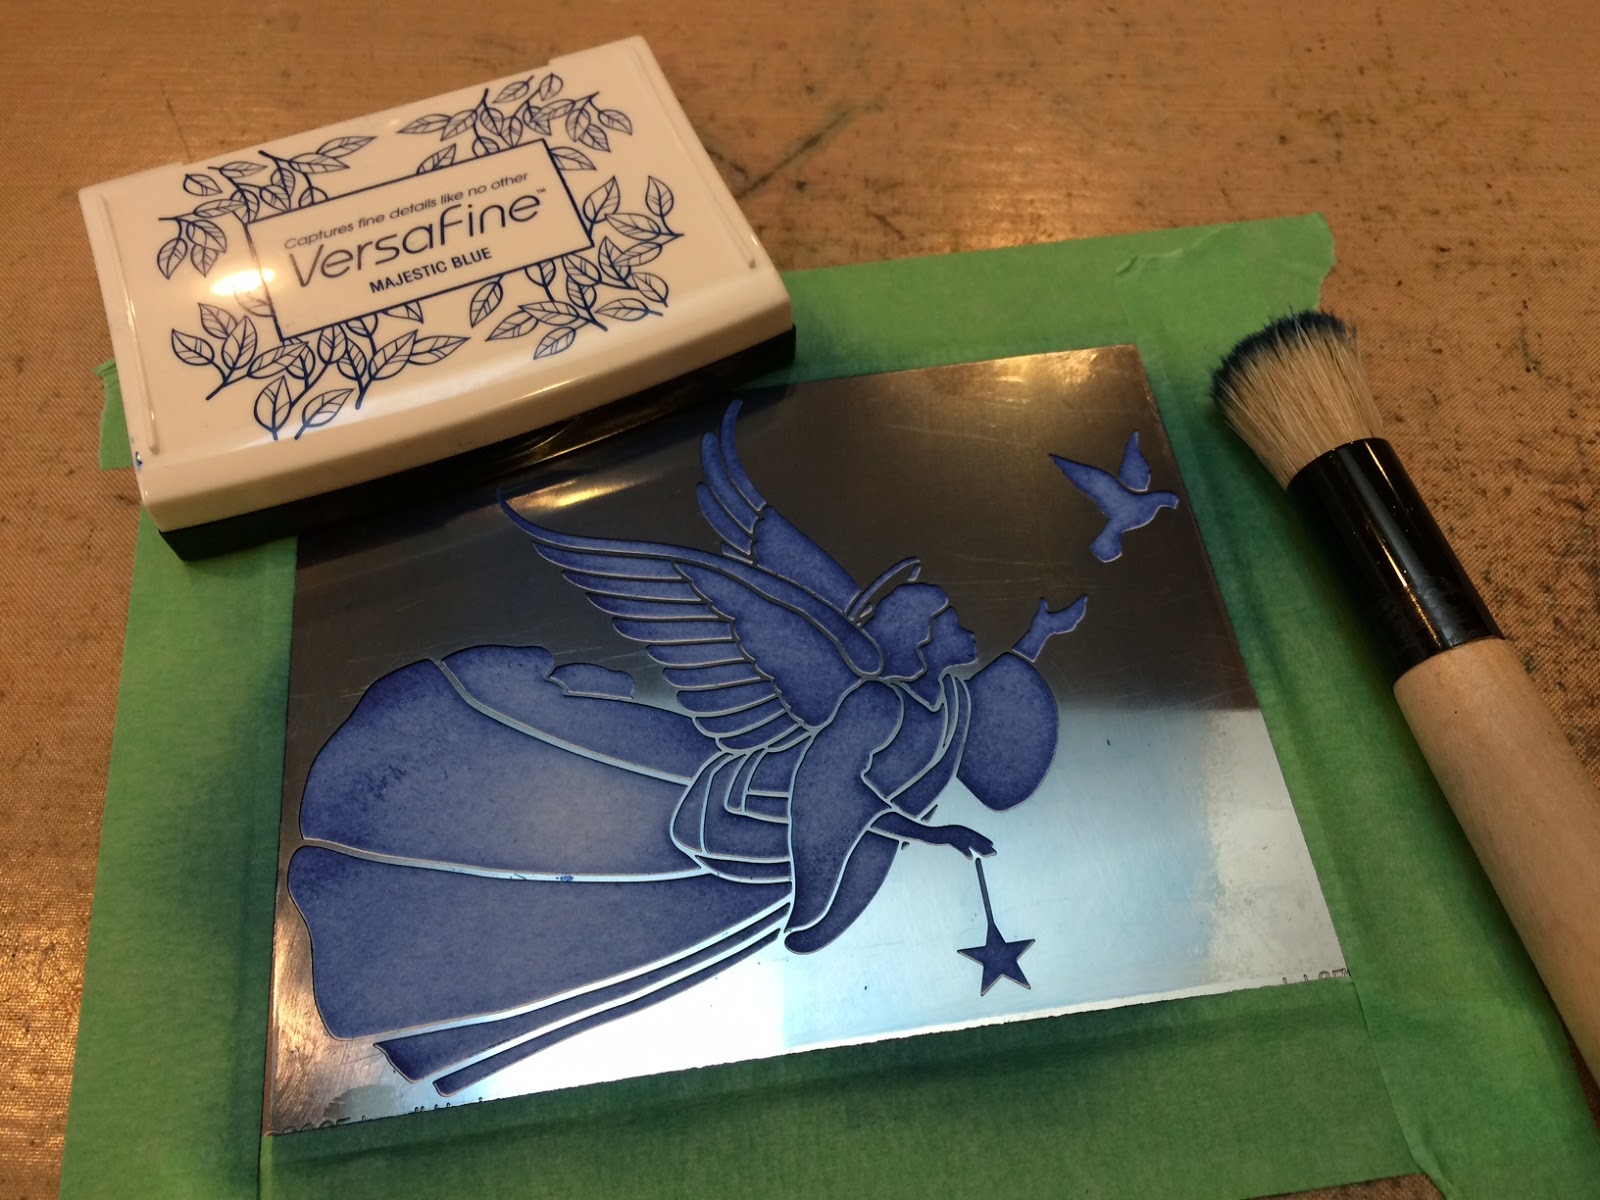
Step 2:  Tape the stencil to a 4 1/4" x 5 1/2" piece of white cardstock and use a 1/2" stencil brush to brush Majestic Blue ink over the whole design, remove the stencil and clean it


Step 3:  Place the clean, dry stencil back over the design, then shift it up and to the left about 1/16", tape in place

Step 4:  Apply Pearlescent Embossing Paste using a Palette Knife and Paste Spreader, remove stencil and place in water for cleaning


Step 5:  Immediately sprinkle Crystal glitter on the wings, halo, bird, and star, carefully tapping off extra away from the rest of the image, let paste dry thoroughly


Step 6: Mount the Angel to a 4 1/2" x 5 3/4" dark blue mat, then to the front of the card toward the left side

Step 7:  Stamp the saying, from the Holiday Expressions set, on white cardstock ( 1 1/2" x 1 1/2") with Majestic Blue ink, mount on a dark blue mat (1 3/4" x 1 3/4")


Step 8:  Attach the saying to the lower right side with foam tape  


For even more great ideas, stop over at the Stampendous Blog for a complete list of today's players.

Louise Healy 

Happy Creating,
Louise

Thursday, November 19, 2015

Believe!

"It's beginning to look a LOT like Christmas,
Everywhere I go..."

So, now that I've got that song stuck in your head for the day, let's see what the Stampendendous Design Team is sharing this week. Our weekly theme has been "The Big Fat Man with the Long White Beard!". Yup, he's checking to see who's been naughty and nice so you better watch out! But we've also been featuring Action Wobble on some posts this week. There's been a lot to see!


Today is Dreamweaver Thursday and what better stencil to match this week's theme than this fun Sleigh and Reindeer Stencil (DWLL556). It fits the theme perfectly and is done with the Double Glitter Technique which makes it sparkly and fun. The saying is "Spirit of Christmas" (CRH321) from Stampendous embossed with red embossing powder. No, it doesn't use an Action Wobble, but some of the other posts today do!


Supplies
Stampendous
MG11 Red Micro Glitter
MG01 Crystal Micro Glitter
EP524 Real Red Opaque Embossing Powder
CRH321 Cling Spirit of Christmas

Dreamweaver
DWLL556 Sleigh and Reindeer Stencil

Plus
Double-sided mounting paper
Handmade Hawaiian Soap
1/2" stencil brush
May Arts Ribbon
VersaMark
Bazzill Green Cardstock
Neenah Papers Classic Crest Cover Solar White 80#
Double-sided tape
Foam tape
Beacon Adhesive FabriTac

Instructions

Step 1:  Fold a 7" x 10" piece of green cardstock in half to form an A7 card

Step 2: Attach a 2 3/8" x 5 1/2" piece of Double-sided Mounting Paper to a green mat 2 5/8" x 5 3/4"

Step 3: Soap the back of the stencil and use a 1/2" stencil brush to clean any flakes of the surface and out of the openings

Step 4:  Remove the release paper from the mounting paper and place the stencil, soap side down, on the sticky surface, use a piece of release paper to press the stencil firmly to the mounting paper

Step 5:  Sprinkle the red micro glitter in all the openings and rub in gently, brush away all extra

Step 6:  Turn the image face down on a clean paper towel and carefully peel the paper off the stencil, making sure to keep the stencil flat on the table

Step 7:  Sprinkle the background with Crystal micro glitter and rub in, tap off excess

Step 8: Tape the Sleigh layer near the top of a piece of white cardstock 4" x 6"

Step 9:  Add a beautiful red ribbon from May Arts then attach to the front of the card

Step 10:  Stamp the Spirit of Christmas saying with VersaMark on white cardstock (1 3/4" x 2 1/2") and sprinkle with Real Red Embossing Powder, tap off excess, heat set

Step 11: Tape the saying to a green mat ( 2" x 2 3/4") and attach to the card with foam tape
Double

Head over to these blogs for more action:


Louise Healy 


Happy Creating,
Louise

Thursday, October 15, 2015

But-tons of Fun!


We are SO EXCITED to be hopping with Buttons Galore and More this whole week. We have some fun projects to share that all include an abundance of buttons that were so generously sent to our team.
Buttons Galore and More provides a wide selection including specialty designed embellishments for celebrations, holidays, and various other events and themes. Find a plethora of choices on their website at Buttons Galore and More!

Prizes

prizebanner2
Three (3) prize packages that include:
  • Cling Create Christmas Stamps Set
  • Create Christmas Die Cut Set
  • Assortment of Buttons
To be eligible, you must be a US resident, comment on our blog and that of each Stampendous designer’s blog posts each day of the hop and tell us in what state you live. Stampendous Official Contest Rules apply. Deadline to comment for our prizes is Sunday, October 18, 2015. Winners will be selected by random.org and we’ll announce sometime on Monday, October 19th.

Wait! There is even more! Be sure to comment and tell us where you’re from, because our Australian Distributor The Stencil Specialists are sponsoring a prize for one friend “down under” to win a Stampendous Stamp, a Dreamweaver Stencil and a surprise goodie from their terrific stock of Stampendous merchandise!

We ARE having tons of fun on the Stampendous Design Team creating with buttons from Buttons Galore! Who wouldn't! Today I've incorporated buttons onto the cute Owl Buddy stencil from Dreamweaver, plus I used the negative of the matching die to finish it off.

Owl Buddy DWLL3039
This was very easy to create. Here's how I did it:
  • Tape the Owl Buddy stencil to a 4" x 5 1/4" piece of decorative cardstock with removable tape
  • Use a palette knife and paste spreader to apply a coat of Matte Black Embossing Paste, remove stencil and place in water for cleaning later
  • Press the buttons on the wet paste, using a variety of colors and sizes, let dry
  • Use the matching Owl Buddy die to cut the owl negative from black paper (save the pieces for another project)
  • Use two layers of black foam tape around the edges of the die cut piece and put it over the buttons
  • Use mini Glue Dots to add four pieces of orange May Arts ribbon around the owl
  • Thread some May Arts jute through four buttons and add them to the corners of the ribbons using more Glue Dots


Check out more great ideas with buttons!

Happy Creating,
Louise

Thursday, September 17, 2015

Dreamweaver Angel

I'm breaking away from the weekly theme today for Dreamweaver Thursday. This easy and quick card is perfect for the holidays when you need to keep things simple.  The color is very non-traditional, but I love how she sparkles!


Supplies
Stampendous
GX220U Ultrafine Crystal Glitter

Dreamweaver
DWLL578 Standing Angel
DWDSP Silver Embossing Paste
DWDPK Dreamweaver Palette Knife
DWLM2010 Paste Spreader

Plus
May Arts Ribbon
Bazzill Basics cardstock Mauve
Neenah Papers Classic Crest Cover Solar White 80#
Double-sided tape

Instructions

Step 1:  Fold a 4 1/4" x 11" Mauve cardstock in half to form an A2 top-fold card

Step 2:  Tape a 2 7/8" x 3 7/8" piece of Solar White cardstock to the front of the card

Step 3:  Paste emboss the Angel stencil on Mauve cardstock with Silver Embossing Paste using a Palette Knife and Paste Spreader, remove stencil and place in water for cleaning

Step 4:  Sprinkle the wet paste with Ultrafine Crystal Glitter, tap off extra, let paste dry

Step 5:  Tape the Glittered Angel layer to the white mat on the front of the card

Step 6:  Tie a piece of grey and white ribbon around the front of the card and tie in a bow

Here are the team members sharing today:
Louise Healy


Happy Creating,
Louise

Thursday, September 10, 2015

Create Christmas Dreamweaver Style!

Today is Dreamweaver Thursday for the Stampdenous Design Team. Our theme this week has been "Create Christmas" featuring our new stamp set CRS5080 Create Christmas, but what better way to "Create Christmas" than with this beautiful Joseph and Mary stencil (DWLL3019) from Dreamweaver at Stampendous!

Joyful, joyful
Supplies

Stampendous:
SSC1233 Joyful Phrases Perfectly Clear Stamps™
SSH38 Small Perfectly Clear™ Acrylic Handle
SSH57 Jumbo Perfectly Clear Acrylic Handle

Dreamweaver:
DWL3019 Joseph and Mary Stencil
DWDGP Gold Embossing Paste
DWDPK Dreamweaver Palette Knife
DWLM2010 Paste Spreader

Plus:
Cardstock by Bazzill Basics Paper® Chocolate
Neenah Papers Classic Crest Cover Classic Cream 80# 04594
Memento Ink Desert Sand, Rich Cocoa
Ink blusher
Zip Dry™ Paper Glue by Beacon Adhesives

Instructions:
  1. Step 1:  Fold a  4 1/4" x 11" piece of cream cardstock in half to form an A2  top fold card
  2.  Step 2:  Tape a 4 1/4" x 5 1/2" piece of chocolate brown to the front of the card
  3.  Step 3:  Use the Jumbo Acrylic Handle to create a collage of the sayings from the Joyful Phrases set, ink with Desert Sand and stamp on a  4" x 5 1/4" piece of cream cardstock, repeat on a smaller  1 1/4" x 1 1/2" piece, then stamp the Joyful, Joyful saying with Rich Cocoa ink on the smaller piece
  4. Step 4:  Use an ink blusher to rouge a little Desert Sand ink around the edges of the background and saying
  5.  Step 5:  Tape the stencil over the stamped background (near the bottom) and apply Gold Embossing Paste using a Palette Knife and Paste Spreader, remove and clean the stencil, let paste dry
  6.  Step 6:  Attach the pasted layer to the card front
  7.  Step 7:  Mount the saying to a dark brown mat, then to the front of the card toward the upper right side
For more Create Christmas ideas stop over at these designer's blogs:

Happy Creating,
Louise

Thursday, September 3, 2015

Holiday Greetings

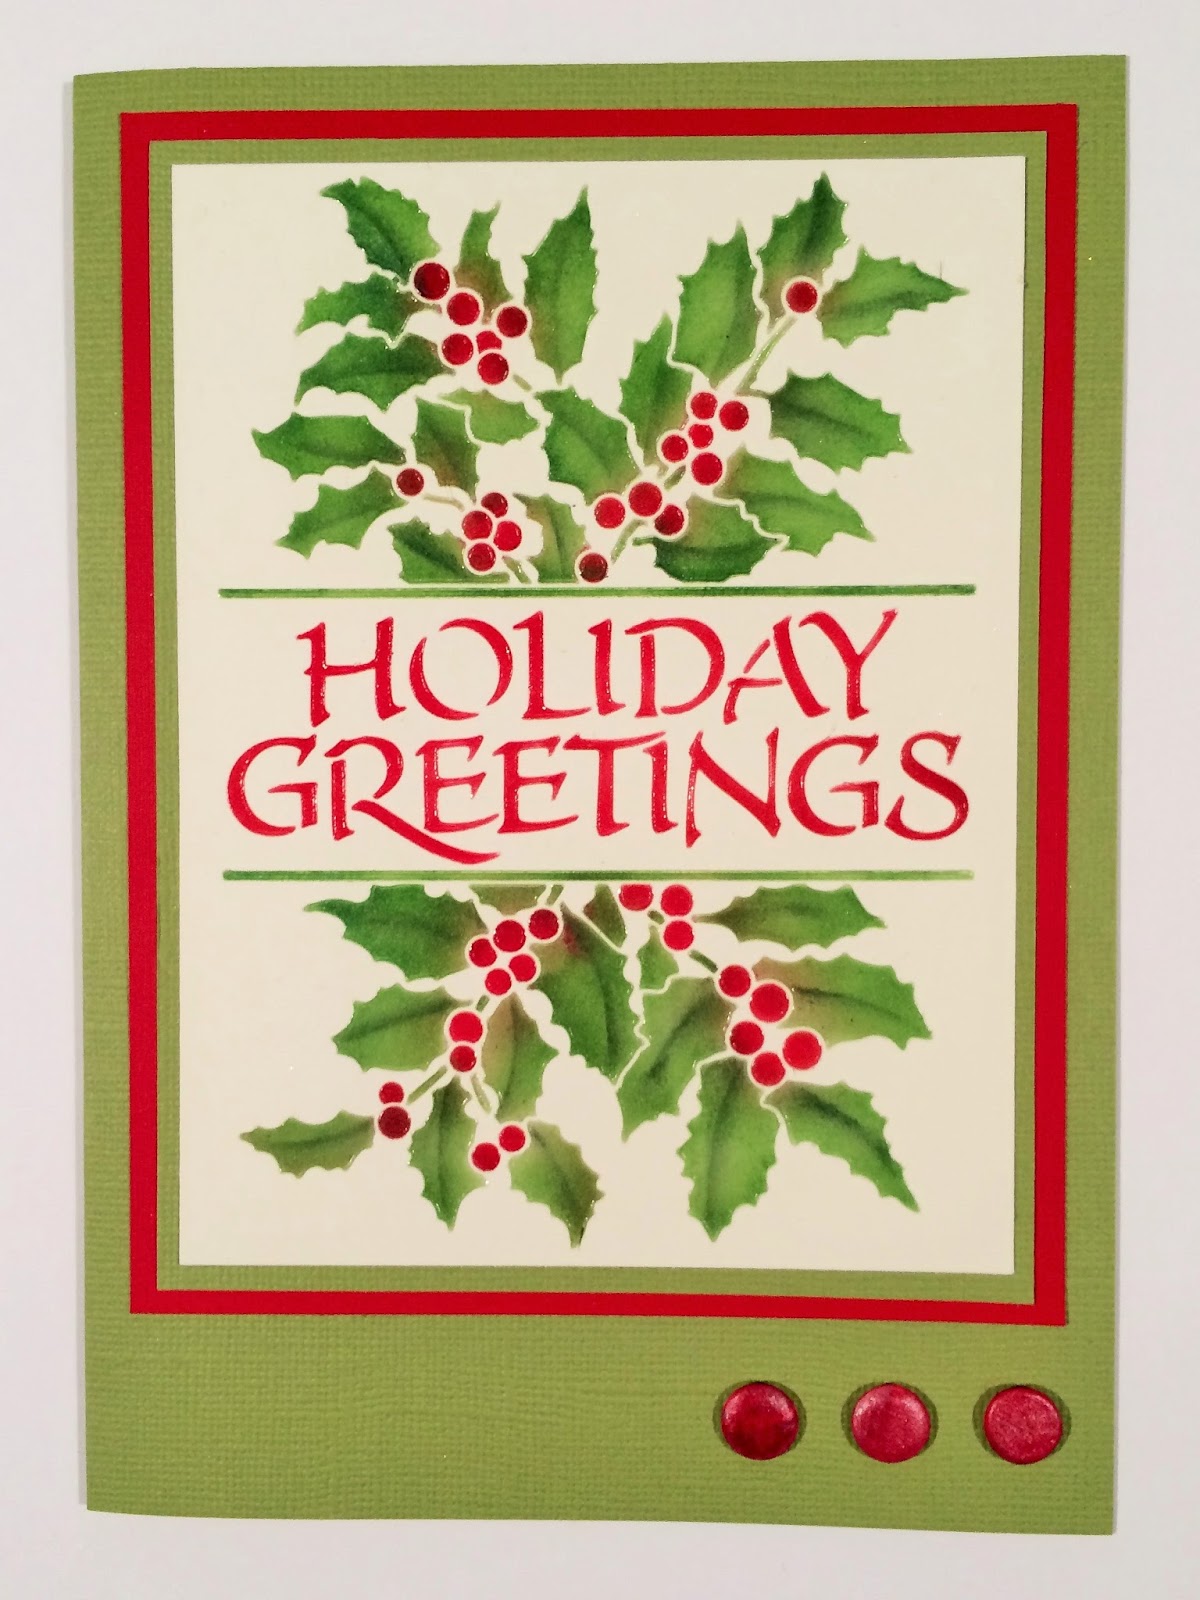
Welcome to Dreamweaver Thursday at Stampendous.  This week our theme is "All in One", which means stamps or stencils that have both an image and a sentiment. This beautiful Holiday Greeting stencils from Dreamweaver fits the challenge perfectly.


It's not hard, you can recreate this elegant card by just following these simple steps:

Supplies

Dreamweaver
DWLJ917 Holiday Greetings Stencil
DWLL332 Picasso Stencil
DWDEPT Transluscent Embossing Paste
DWDPK Dreamweaver Palette Knife
DWLM2010 Paste Spreader

Plus
Bazzill Basics Cardstock Parakeet - 7" x 10" and 4 1/4" x 5 1/2"
Neenah Papers Classic Linen Cover 80# Red Pepper  - 4 1/2" x 5 3/4"
Neenah Papers Classic Crest Cover Classic Cream 80# - 4 1/4" x 5 1/2", trim to 4" x 5 1/4"
1/4" Stencil Brushes
Brilliance Ink  - Pearlescent Ivy, Pearlescent Thyme, Rocket Red
Double-sided tape
Candis
Chameleon Pen RD4, CG8

Instructions

Step 1:  Fold a piece of Parakeet cardstock in half to form an A7 card

Step 2:  Tape a mat of Red cardstock toward the top of the card, then a mat of Parakeet

Step 3:  Tape the Holiday Greetings stencil to Natural cardstock with removable tape, and use 1/4" stencil brushes to apply inks using the Picasso tool as a shield to keep colors clean and to add "veins" to some leaves

Step 4:  Remove the stencil, clean and dry it well, return the clean, dry stencil over the colored image

Step 5:  Paste emboss the image with Translucent Embossing Paste using a Palette Knife and Paste Spreader, remove stencil and place in water for cleaning, let paste dry

Step 4: Trim the dry image to 4" x 5 1/4" and tape to the front of the card

Step 5:  Use Chameleon pens to color three Candis embellishments to match and place near the bottom right side of the card

The list of today's "All in One" participating designers:

Happy Creating,
Louise

Friday, August 7, 2015

Create Fall Finale!

This is our final day for our weekly theme of "Create Fall". We hope you've been inspired by all the creations you've seen this week from our team. Fall is right around the corner, and now is the perfect time to start making those Fall, Halloween, and Thanksgiving cards.

Today I have a little tutorial for you featuring the beautiful Oak Leaf and Maple Leaf stencils.

Supplies:DWLL3043_DWLL3044_LH_800


Stampendous:
CP811 Creative Palette
NKCRS02 Cling Wired Set
SSH57 Jumbo Perfectly Clear™ Acrylic Handle

Dreamweaver:
DWLL3043 Oak Leaf Stencil
DWLL3044 Maple Leaf Stencil
DWCEP Crackle Embossing Paste
DWNHB-12 1/2" Brush
DWNHB-18 1/4" Brush
DWLL332 Picasso
DWDMBP Matte Black Embossing Paste
DWLX7024 Zen Flower
DWDPK Palette Knife
DWLM2010 Paste Spreader

Plus:
Memento Inks - Dandelion, Tangelo, Lady Bug, Rhubarb Stalk, Bamboo Leaves, Potter's Clay (to color the maple leaf)
Chameleon Color Tones Pens - YL2, OR4, RD4, OL3, CB (on the Crackle Paste)
Acrylic Paints
Core'dinations Tea Dye cardstock
Neenah Classic Linen Cover 80# Epic Black 08126 (to use with the Creative Palette)
Neenah Classic Crest Cover 80# Classic Cream 04594
Tonic Ticket corner punch
Brayer

Instructions:

  1. Fold the Tea Dye card in half to form an A7 card.
  2. Brayer acrylic paints on the Creative Palette and press the black cardstock over it, lay the Zen Flower stencil on the palette and gently brayer more paint over it, press the cardstock back over the stencil and paint, dry well.
  3. Tape the Maple Leaf stencil to cream cardstock and use 1/4" stencil brushes to add color, use an edge of the Picasso tool to add "veins" to the leaf.
    Step 0 Step 1
  4. Lay the Oak Leaf stencil  near the opposite side and tape in place.
    Step 2 Step 3
  5. Apply Matte Black Embossing Paste using a Palette Knife and Paste Spreader.
    Step 6
  6. Remove and clean the stencil, let the paste dry.
    Step 5
  7. Place the clean, dry stencil back over the dry paste and skim a coat of Crackle Paste over the dry Black paste using a Palette Knife and Paste Spreader.
    Step 6
    Step 7
  8. Remove and clean the stencil, let the paste dry, it will crackle as it dries.
    Step 8 Step 9
  9. Color the dry Crackle paste with  Chameleon Pens, use a 1/2" stencil brush to rouge some color around the edges, then stamp with the background stamp from the Wired set, ticket punch the corners and mount on a black mat, then the card front.
  10. Create a fall colored background using the Creative Palette, acrylic paints and a brayer. The Zen Flower stencil was used too to add a pretty pattern to the background.

These designers are falling all over themselves with great ideas to share with you!


Louise Healy


Happy Creating,
Louise
Thursday, August 6, 2015

Fall Borders

It's Dreamweaver Thursday for the Stampendous Design Team so today you'll be treated to a wonderful collection of Fall themed creations.  That's because our theme for this week is "Create Fall"! There are so many wonderful Stampendous stamps and stencils to choose from for this theme, it's easy to get inspired.

Today I have chosen the Fall Borders stencil (LJ874). It's a gorgeous stencil with two different corner images on one stencil.  You can use both of them, or one at a time. I just love the pumpkin corner, and paired with a great sentiment from the Friendship Assortment Set, it makes a wonderful Fall card.

Supplies:DWLJ874_LH_800

Stampendous:SSC1116 Friendship Assortment Perfectly Clear Stamps™ Set
Dreamweaver:
DWLJ874 Fall Borders Stencil
DWLL332 Picasso stencil
DWDEP Regular Embossing Paste
DWGHB-6  1/4" Brush#6 Gold Handle
DWDPK Dreamweaver Palette Knife
DWLM2010 Paste Spreader
Plus:Cardstock by Bazzill Basics Paper®
Neenah Papers Classic Crest Cover Classic Cream 80# 04594
Neenah Papers Classic Linen Cover Epic Black 80# 08126
Brilliance Inks - Sunshine Yellow, Pearlescent Orange, Pearlescent Thyme, Pearlescent Ivy, Coffee Bean
Versafine Olympia Green
ZipDry™ Paper Glue by Beacon Adhesives™
Foam Mounting Tape

Instructions:

Step 1:  Fold a 5" x 10" green card in half to create a 5" x 5" card
Step 2:  Tape off the corner of the stencil across from the pumpkin, then tape the stencil to a piece of cream cardstock 4 1/4" x 4 1/4" lining up the pumpkin in the lower left corner
Step 3:  Paste emboss the image with Regular Embossing Paste using a Palette Knife and Paste Spreader, remove and clean the stencil, let paste dry
Step 4:  Return the clean, dry stencil over the dry paste, and use 1/4" stencil brushes and ink pads to add color to the design
Step 5:  Stamp the saying on a small piece of cardstock with VersaFine™ Olympia Green ink, layer on a small black mat
Step 6:  Layer the pumpkin on a black mat, then to the front of the card
Step 7:  Add the saying using foam tape for dimension

More Fall creations await at these designer blogs today!


Stampendous
Louise Healy 


Happy Creating,
Louise


Tuesday, August 4, 2015

The Great Pumpkin

Fall is my FAVORITE time of the year! I love the crisp, cool air, sunny days, colors, you name it, Fall is fabulous! So when I heard the theme this week  for the Stampendous Design Team was Create Fall, I was thrilled! The team has been sharing lots of great samples for the Christmas season from the July 2015 Stampendous Catalog, so now we are turning to our Fall creations. We hope you enjoy them!

Today I'm sharing The Great Pumpkin stencil, with a combination of Chameleon markers, Dreamweaver Paste, and Stampendous fabulous Frantage Embossing Enamels.
DWLL3036_LH_800

Supplies:
Stampendous:
EJK07 Encrusted Jewel Bronze Kit
FREG023 Aged Silver Embossing Enamel
FREG025 Aged Copper Embossing Enamel
FREG026 Aged Black Embossing Enamel
EP102 Pirates Gold Embossing Powder
FRG08C  Bronze Glass Glitter
FRC05 Taupe Color Fragments
FRM04 Tea Stained Mica Fragments

Dreamweaver:
DWLL3036 The Great Pumpkin Stencil
DWDGP Gold Embossing Paste
DWDPK Palette Knife
DWLM2010 Paste Spreader

Plus:Cardstock by Bazzill Basics Paper®
Classic® Epic Black & Classic Cream Linen Cover Stock by Neenah Paper®
French Country Collection Montage Paper by Graphic 45®
Chameleon™ Markers (YL2, YO3, OR4, OL3, BR5, CB, BK4)
Micron Pen (Black 02) by Sakura®
ZipDry™ Paper Glue by Beacon Adhesives™
Glue Dots
Heat Embossing Tool

Instructions:

  1. Fold a 7" x 10" cream card in half to create an A7 card
  2.  Tape patterned paper (3" x 7") near the top fold of the paper, and green (2" x 7") under near the bottom edge, place a small black strip (1/4" x 7") over the seam.
  3. Place the stencil on the left edge of a 4" x 5 1/4" piece of cream cardstock and outline the openings of the stencil with a Black Micron Pen, move the stencil to the right side and trace another pumpkin along the right side.
  4. Trace 6 extra leaves on cream paper.
  5. Color the two pumpkins and the extra leaves with Chameleon Pens, cut out the extra leaves and edge with the black Chameleon.
  6. Place the stencil in the middle of the two colored pumpkins and paste emboss the image with Gold Embossing Paste using a Palette Knife and Paste Spreader, remove the stencil and place in water for cleaning.
    LL3036 A
    LL3036 B
  7. Sprinkle the wet paste with a combination of Chocolate, Aged Copper, Vintage Mahogany and Pirate Gold embossing powders, let dry, tap off extra powders, then heat emboss the powders.
    LL3036 CLL3036 D
  8. Mount the pumpkins on a 4 1/8" x 5 3/8" black mat, then sprinkle the bottom area of the pumpkins with a combination of aged silver and aged black embossing powder topped with Bronze glass glitter, taupe color fragments, tea stained mica flakes and heat from underneath until the embossing powders melt and hold the texture items.
    LL3036 E
  9. Mount the pumpkins to the card front, and add more powders and elements along the bottom and heat from below.
  10. Use glue dots to add the extra leaves near the base of the pumpkins.


See more great Fall ideas at these team members:
Louise Healy


Happy Creating,
Louise

Thursday, July 30, 2015

Much Ado About Paste!

Where is the summer going! Can it really be almost August!  I don't know about you, but the older I get, the faster the time seems to go! I'm up in beautiful northern Minnesota this week, getting a little "lake" time, hopefully the nights won't be too cold yet! 

This beautiful Christmas Borders stencil is perfect for a technique that is very popular with stampers right now, the triple layer technique, and the Pearlescent Embossing Paste gives it a wonderful, wintery shimmer.

Supplies:DWLJ922_LH_800

Dreamweaver:
DWLJ922 Christmas Borders Stencil
DWDPP Pearlescent Embossing Paste
DWDPK Dreamweaver Palette Knife
DWLM2010 Paste Spreader
Plus:
Neenah Papers Classic Linen Cover Red Pepper 80# 05847
Stardream Papers Shimmer White
May Arts Ribbon
ZipDry™ Paper Glue by Beacon Adhesives™

Instructions:

  1. Step 1:  Fold a piece of  6" x 9 1/4" red cardstock in half to form an A6 card
  2. Step 2:  Cut three pieces of red cardstock, 1 - 4 1/4" x 5 1/2", 1 - 3 1/4" x 4 1/2", 1 2 1/4" x 3 1/2"
  3. Step 3:  Use a small amount of dot roller or repositionable tape to layer the three pieces of red paper on each other, tape the stencil over the red paper
  4. Step 4:  Apply Pearlescent Embossing Paste using a Palette Knife and Paste Spreader, remove and clean the stencil, let dry thoroughly
  5. Step 5:  When the paste is dry, use an x-acto knife to carefully cut each layer apart, trim the largest red layer right along the edge of the paste (it should be 3 7/8" x 5 1/8")
  6. Step 6: Cut three pieces of white shimmer cardstock, 1 - 2 1/2" x 3 3/4", 1 - 3 1/2" x 4 3/4", 1 - 4 1/8" x 5 3/8",  adhere the corresponding red layer to each, then adhere them to each other
  7. Step 7:  Wrap a white, May Arts, ribbon around the layers and tie a bow
  8. Step 8:  Attach pasted image to the front of the card

Because I'm traveling, I don't have access to the last list of team members sharing today, but if you hop on over to the Stampendous blog, you'll find the complete list!

Happy Creating,
Louise

Tuesday, July 28, 2015

Playing with Paste!

And the fun continues for the Design Team! This week we have a theme of "Playing with Paste". There are so many amazing ways to use the various embossing pastes. They are gorgeous and fun to use!

Here is a simple Christmas card I made for the July 2015 Stampendous Catalog. The gold manger scene lends an elegant touch, yet the burlap ribbon and metallic embossing enamels remind us of the rustic side of this blessed event. You might be surprised how I got the gold Manger! Read on...


Supplies
Stampendous
FREG023 Frantage Embossing Enamel aged silver
FREG025 Frantage Embossing Enamel aged copper
EP102 Metallic Embossing Powder Pirate Gold

Dreamweaver
DWLL334 Manger
DWDEPT Dreamweaver Translucent Paste
DWDPK Dreamweaver Palette Knife
DWLM2010 Paste Spreader

Plus
May Arts Burlap ribbon (red edge pulled off)
Neenah Papers Classic Linen Cover Red Pepper 80#
Neenah Papers Classic Crest Cover Classic Cream 80#
Double-sided tape
Foam mounting tape

Instructions

Step 1:  Fold a 5 1/2" x 8 1/2" red card in half to form an A2 card

Step 2:  Tape a 4" x 5 1/4" piece of cream cardstock to the front of the card

Step 3:  Pull the finished edge off both sides of a burlap ribbon and place near the left side of the card

Step 4:  Sprinkle some aged copper, aged silver, and Pirate Gold embossing powders randomly down the burlap, heat from below to set the powders

Step 5:  Paste emboss the Manger stencil on cream cardstock (3" x 3") with Translucent Paste using a Palette Knife and Paste Spreader, remove stencil and place in water for cleaning

Step 6:  Sprinkle the wet paste with Pirate Gold Embossing Powder, tap off extra, let paste dry, then heat set

Step 7:  Tape the embossed Manger to a red mat (3 1/4" x 3 1/4") and attach to the front of the card with foam tape

Seeing as everyone is not as lucky as I am to be a part of a design team and have access to a large variety of product, I decided to use the Translucent Paste and gold embossing powder instead of Gold Embossing Paste to show the type of thing you can do with limited supplies. If you can only have a couple of pastes, I would highly recommend making the Translucent paste one of them. It can be used over a stenciled image to create a clear, glossy finish, you can mix reinkers, paints, or mica powders into it to create any color paste you want, or sprinkle it with embossing powder like I did.

Be sure to check out what other team members have been play with too! I'm on vacation in beautiful northern Minnesota this week, so look for the complete list of participants over at the Stampendous Blog! (Hopefully I won't get eaten alive by the bird-size mosquitoes up there!)

Happy Creating,
Louise