Thursday, March 21, 2013

A Bloomin' Spring!

How I wish I could say it felt like Spring today, but I can't! Even though the sun has been shining brightly the last two days, it has been very cold and very windy here in northern Illinois.  My daffodils continue to bravely grow a little taller each week and hopefully will be in bloom for Easter (oh my! I haven't even started Easter cards!)
This week the Dreamweaver Stencils Design Team welcomes our new members who will start posting with us in April. Welcome aboard everyone, we can hardly wait to see what you will share with us!
The cards I am sharing with you this week will be featured in my upcoming class in Marshfield, WI at Stampin' N Scrapin' Fun on April 4th.  Give Jean a call to sign up if you're in the area, we are going to have a great time! We'll be creating three cards using three different Dreamweaver techniques, and the Long stem iris (LL374)  stencil is yours to take home after class.


Want to learn more about how we create with Dreamweaver products? Give your local craft store a call to see if they offer Dreamweaver classes. Here's a link of Where to Buy locations. Your local store doesn't carry Dreamweaver? Tell them you NEED them to carry this fun line, or check out the online locations too.
As usual, the rest of the team has more beautiful creations for you, so be sure to stop over at their blogs to see what's new this week.

Happy Creating,
Louise

Thursday, March 14, 2013

A Bloomin' Spring!

Welcome back to week 2 of the March Dreamweaver Stencils design challenge. This month our challenge is "A Bloomin' Spring!", which naturally leads to spring flowers popping up and birds returning for the season. We would love to have you join our fun. Make your own creation and post it on your site then link it on the DREAM it UP! blog using the Mr. Linky tool.  Don't have a way to post your creation? Not a problem, just email a photo of your card or project to lynell@dreamweaverstencils.com and she will post it for you. You could win a great prize!
This week I will show you the Faux Tile technique. It's fun and can be done with virtually any stencil. Here we go:
Place the Diamond Grid (LJ882) stencil on the large platform
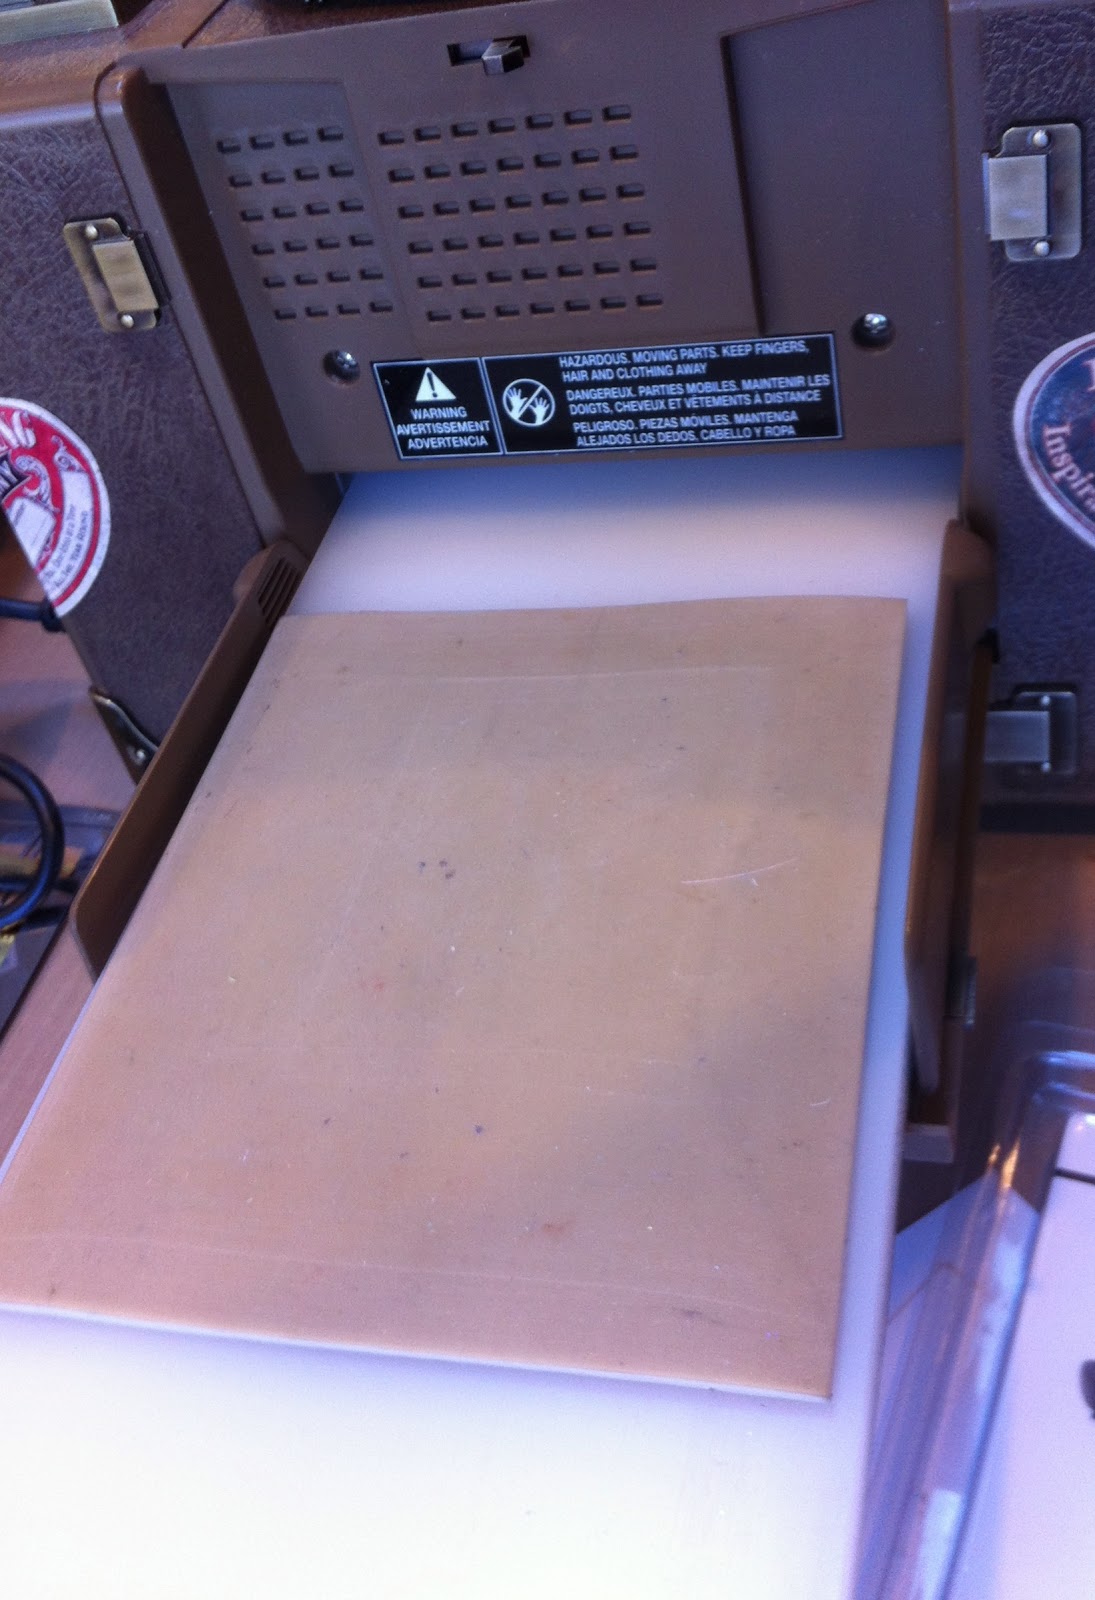
of your die cut machine
Lightly mist your paper with water or alcohol and tape over the grid

Place the rubber embossing mat over the grid and paper

Place two clear cutting mats over the grid and paper and run thru the machine

Here's the back of the embossed grid

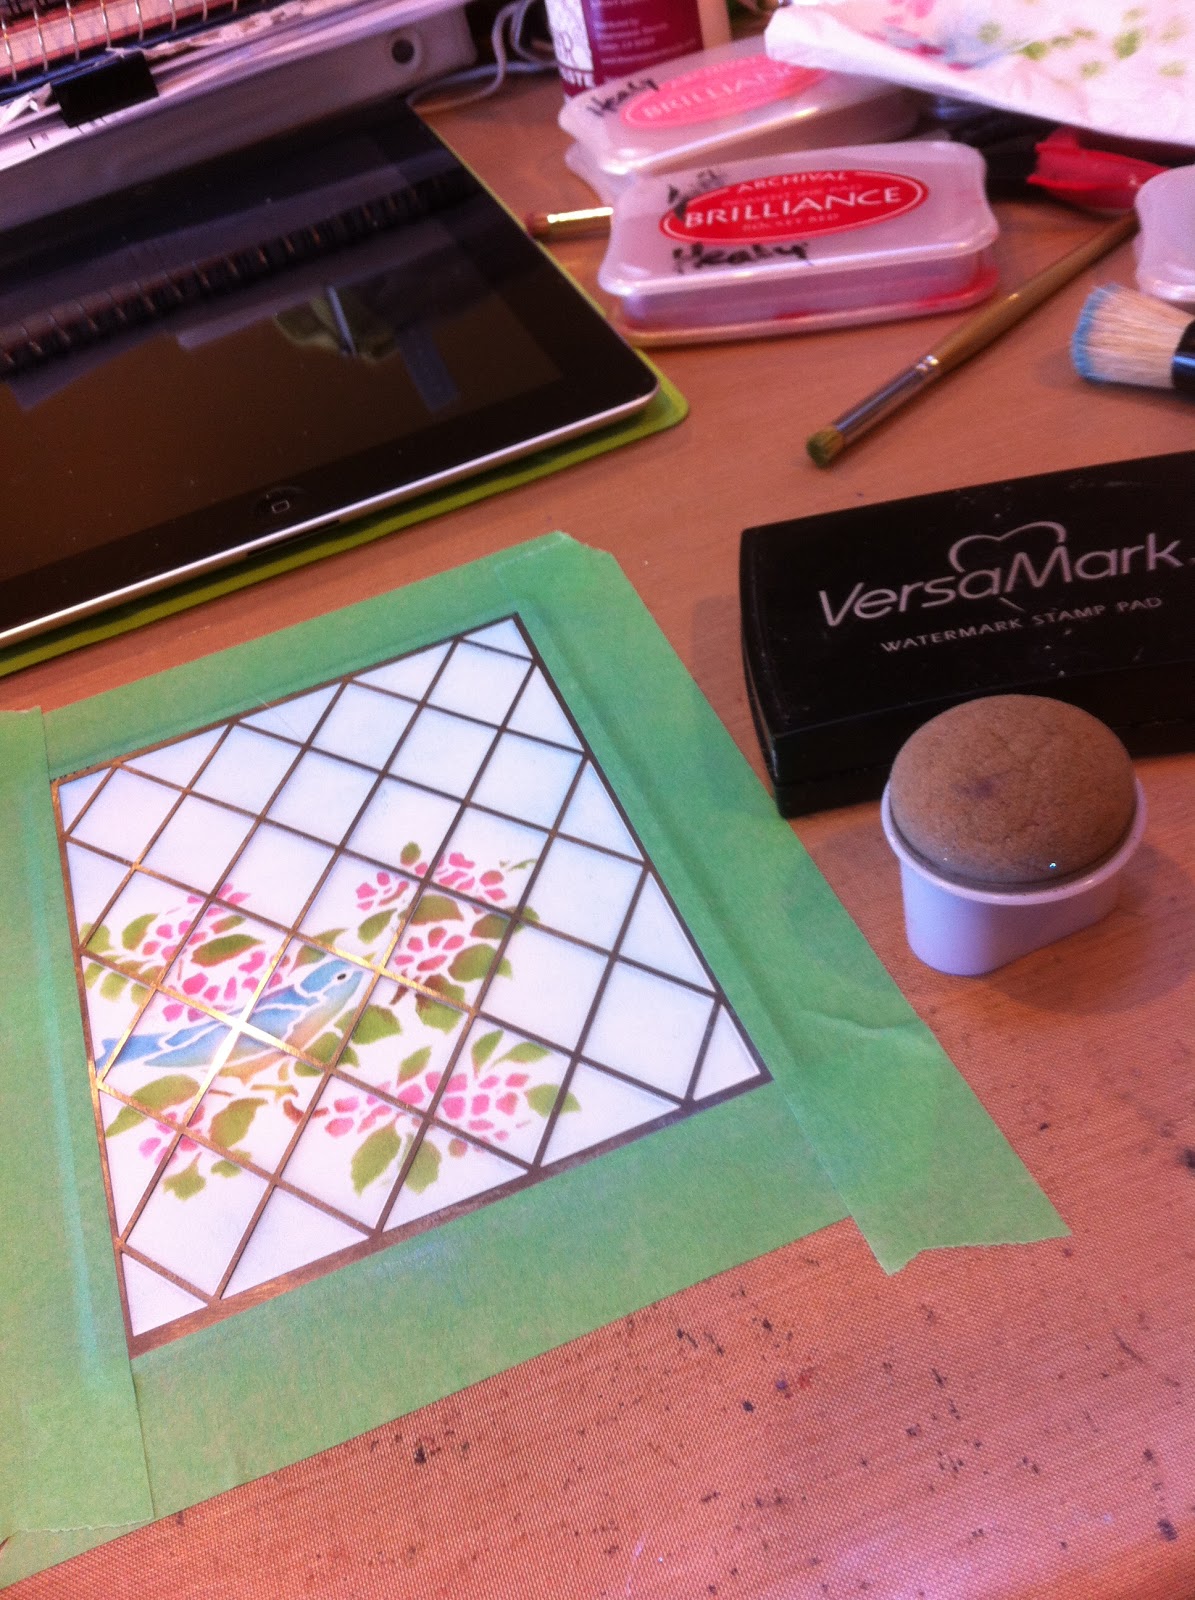
Turn the embossed image to the front and tape the grid stencil back in place
 
Use small pieces of removable tape to cover the frame portion of the Birds & blossoms (LG646) stencils

Tape the bird to the lower left side of the grid stencil
Use small stencil brushes to add color to the bird design
Remove the Bird & blossoms stencil


Use a larger stencil brush to add some light blue in the background


Use a finger dabber to add VersaMark ink over the entire grid

Remove the grid stencil and cover with Clear Embossing Powder,
heat to set

Return the grid stencil, add another coat of VersaMark and Clear Embossing Powder,
heat to set

Mount into a beautiful card and add some gorgeous ribbon from May Arts!
 
Close up of the tile
I hope you enjoyed learning about this great technique. The rest of the team have more great creations for you, so please check out their blogs too!

Happy Creating,
Louise

Thursday, March 7, 2013

A Bloomin' Spring!

Welcome to the Dreamweaver Stencils March Designer Challenge! Our theme this month is "A Bloomin' Spring!" so you'll probably be seeing alot of our beautiful floral stencils being displayed in this fun challenge. It doesn't look much like spring here in northern Illinois right now, we have about 4-5" of snow on the ground and are supposed to be getting another 5-6" this week! March came in like a lion and I sure hope it goes out like a lamb!
As soon as I heard the theme of this month's challenge, I knew what stencil I would use first, the beautiful Long Daffodils stencil (LL428). My daffodils were actually starting to pop through last week, now they are covered with a blanket of snow! But, a few more warm days and they'll be fighting their way through again.  Sadly my creation for this week is serving double duty, for this challenge and as a Sympathy card for my dear sister-in-law on the loss of her husband of 35 years. The daffodils give that perfect feel of comfort and hope of new life so I decided to change my card from a "spring" card to a "comfort" card. I think it worked out very well.

Long Daffodils - LL428

Here are the simple steps I used:
  • Cut cream colored linen cardstock (4 1/4" x 11") and score in half to create an A2 size card that opens at the bottom
  • Tape the stencil to the left side of the front of the card with removable tape
  • Place the card, stencil side down on a light box, and use a stylus to dry emboss the image
  • Move the stencil over to the right and down a little to emboss a second image
  • Place the stencil back over the first embossed image and use small stencil brushes to stencil on color
  • Repeat with the second image
  • Tape off the word "comfort" from the Comfort combo (LG696) stencil and place the word in the upper right corner of the card
  • Use a small stencil brush to stencil on brown ink
  • Remove and clean the stencil
  • Use a 3/4" or 1" brush to rouge a lighter brown ink around the edges
  • Tie a yellow ribbon around the front portion of the card and tie a bow
For the inside:

  • Place the Long Daffodils stencil along the left edge and stencil on color with small stencil brushes
  • Tape off the "With Deepest Sympathy" part of the Comfort combo stencil and place it along the right side of the card
  • Stencil brown ink through the words
  • Rouge some light brown ink at the base of the flowers
  • Attach the card to a small yellow mat (4 3/8" x 5 5/8") then to an A6 size piece of orange cardstock (4 3/4" x 6")
Please be sure to stop over at the rest of the team blogs for more wonderful ideas on using these beautiful stencils.
Happy Creating,
Louise

Thursday, February 28, 2013

Love and Friendship

Here we are in the final week of February already!  Where do the weeks go. This is the last posting for our Dreamweaver Stencils theme of CAS Love and/or Friendship. We hope you've enjoyed our creations this month and remember we especially love when you play along with us or leave us comments.
This week I created a simple card that could easily be used for any kind of note you wanted to send, Thank You, Thinking of You, Birthday, Anniversary, Sympathy, etc.  It is always wonderful to receive a handwritten note from a friend.


Here are the simple steps:
The rest of the team has more great designs to share with you so be sure to hop over to see them all.

Happy Creating, Louise

Thursday, February 21, 2013

Friends Forever

Welcome to the third week of our Dreamweaver Stencils February design challenge. Our theme this month is Love and/or Friendship and the team has come up with some beautiful creations to share with you. We would love to have you join our challenge, click here to link your creation to Lynell's DREAM it UP! blog using the Mr. Linky tool, or email a picture of your creation to me, Louise,at louisehealy@sbcglobal.net  and I will post it on Lynell's blog for  you for a chance to win a great prize!
If you haven't heard, Dreamweaver Stencils is looking for a few talented people who love to share their creations with others. Our new Design Team Call runs until the end of February.  See Pam's blog for all the details on how to apply.
This week I am blessed to be spending time with my beautiful grand-daughter and lovely daughter-in-law while my son is traveling. I cherish these times especially because we live pretty far apart so I don't get to be with them very often. Thank goodness for Skype! Family means the world to me, but so do friends, so this week I dedicated my card to three very dear friends of mine, or "The Ladies" as my family calls them. We all met when our kids were in high school (over 15 years ago!), and still meet regularly for lunch and to share family news. I know they will be my friends forever.


This is not exactly a CAS (clean and simple) card, but it's really not very hard to create. Here's how you do it:
  • Emboss the Butterfly stencil (LJ916) on white cardstock using a personal die cut machine
  • With the stencil still in place over the embossed butterfly, use small stencil brushes to add various inks to the wings and body
  • Use a finger dauber to apply a coat of VersaMark ink over the colored image
  • Remove the stencil and sprinkle the butterfly with Stampee Bonding Powder, tap off excess powder
  • Use a heat gun to gently heat the powder
  • Place a sheet of Stampee Water Clear  Foil over the butterfly
  • Place the image in a paper folder and insert the folder into a laminator and let it feed through
  • Quickly peel off the foil sheet. The foil will stick to the butterfly where you had the bonding powder, but release where you didn't
  • Trim around the butterfly and edge with a coordinating marker, set aside
  •  Emboss the Triangle Weave (LJ912) stencil on white cardstock through a die cut machine
  • Remove the stencil and use a 3/4" stencil brush to brush color over the embossed image from all four sides.
  • Trim close to the design, and layer onto a light yellow mat
  • Layer those two onto a darker yellow mat
  • Place the Forever Friends stencil (LM2013) on white cardstock and use a small stencil brush to add ink to the design
  • Cut the words apart and brush the remaining ink from the brush into the background of the words
  • Mount them on light and dark yellow mats
  • Place small strips of foam tape behind the body of the butterfly
  • Place a  Dreamweaver Embellishment Pin (green) through the head area of the butterfly and then into the front of the card, dont' forget to take the release paper off the foam tape first
  • Add a pretty bow with glue dots
  • Add the stenciled words
  • Write a little note inside and share it with a wonderful friend!
The rest of the team has more ideas to share with you too, just click on their names to jump to their blogs.

Happy Creating,
Louise

Thursday, February 14, 2013

Happy Valentine's Day!

The timing of today's posting for the February Dreamweaver Stencils challenge of Love and/or Friends is perfect! What better day than Valentine's Day to express your love and appreciation to your family and friends. I hope you all have a wonderful day filled with love, friendship, and, of course, chocolate!
Do you love creating art using these wonderful Dreamweaver Stencils products? Then you should apply to be part of the Dream Team! We have a new Design Team call that just started, so there's still time to submit your work. Check out the details over at our leader Pam's blog for all the details and deadlines.
Today I am sharing a card that I will be teaching in an upcoming class so I can't share all the details yet, but I think you'll be able to figure it out. Here it is:
LL374 - Long Stem Iris

Wouldn't this be a lovely wedding, birthday, anniversary, thinking of you....well, you get the picture! Simple, yet elegant, right in line with the Clean and Simple (CAS) style that is also part of our February challenge.

I hope you'll join our fun this month. Just link your creation on the DREAM it UP! blog using the Mr. Linky tool, or email a picture to us and we'll post it on Lynell's blog. Lynell and Pam are off to the big show in the UK for the next couple of weeks, so use my email, louisehealy@sbcglobal.net and I will post it. There are prizes involved, so get busy!

The other team members have more wonderful samples to share with you, enjoy!
Happy Creating,
Louise

Thursday, February 7, 2013

February Dreamweaver Stencil Challenge Begins Today!

The new Dreamweaver Stencils monthly challenge for February has the theme "CAS Love and Friendship!". That means keep it Clean and Simple, my favorite kind of design.  We have also kicked off a new design team call, see Pam's blog for the the details. Being part of the Dream Team is fun and challenging!
This week I thought I would use the challenge to create a Valentine for my husband. I know it's not until next week, but we'll be celebrating this weekend instead. He is a horticulturalist, so I decided I would use the beautiful Pansy stencil (sorry this is retired) with the You & Me (LS1004) and part of the Forever Friends (LM2013) stencil.
Front of the card

Inside of the card

This could not be any easier and fits the challenge of Clean and Simple challenge along with Love and Friendship too.

  • Tape each stencil to a piece of Hanko Sea Foam cardstock (one of my favorite!) with removable tape (mask off the friends part of the forever friends stencil)
  • Use a palette knife and paste spreader to apply a coat of Matte Black Embossing Paste (DMBP) across each stencil
  • Remove stencils, let paste dry, and clean your stencils
  • Mount each pasted image on a small black mat 
  • Adhere the You & Me to upper left corner of the card
  • Tie a black ribbon around the bottom portion of the card
  • Adhere the Pansy layer to the lower left corner with foam mounting tape
  • Adhere the forever inside the card
Clean and Simple doesn't mean it can't look great. Beautiful papers can really help create an elegant card!
Now go check out the rest of team's creations for our new challenge. Don't forget you can enter your own creations by linking your designs on the DREAM it UP! blog or by emailing a picture of your design to lynell@dreamweaverstencils.com and she will post it for you. 
Happy Creating,
Louise