Monday, March 13, 2017

Birdhouses in the Garden

WOW! We have a fun week planned for you! Stampendous is working with the wonderful products provided to us by DecoArt for our projects. Our two teams will share ideas all week with a grand finale hop on Friday!

Of course there are Prizes!!!!! 
Comment to win one of three HUGE prize packages that includes Andy Skinner stamps and DecoArt Media™ Paint plus more!  US winners only, see Stampendous Official Contest Rules here for more details.
Want to see all that’s in each prize package? Take a look below:

Stampendous:
  • ASCRS07 Cling Handle with Care
  • ASCRS08 Cling Skuldoggery
  • ASCRS09 Cling Unexplained
DecoArt:
  • Quinacridone Magenta
  • Cobalt Turquoise Hue
  • Cobalt Teal Hue
  • Primary Magenta
  • Transparent Yellow Iron Oxide
  • Paynes Gray
  • Carbon Black
  • Titanium White
  • Prussian Blue Hue
  • Phthalo Blue
  • Quinacridone Gold
  • Diarylide Yellow
  • Pyrrole Red
  • Green Gold
  • Primary Yellow Media Mister
  • Titanium White Antiquing Cream
  • Patina Antiquing Cream
  • 8oz Bottle Lamp Black Americana Acrylic Pain
Today I've created a little canvas that combines stamps and stencils from Stampendous along with paints and liquid glass from DecoArt.


Birdhouses in the Garden
Here are the  supplies and instructions:

Stampendous:
CRP297 Cling Script Lines
FMS4013 Birdhouses Metal Stencil

Dreamweaver:
DWDGP Gold Embossing Paste
DWDPK Palette Knife

Plus:
6" x 6" x 1" Canvas
Flat broad paint brushes
DecoArt White Gesso
DecoArt media Fluid Acrylics - Transparent Yellow Iron Oxide, Primary Magenta, Green Gold, Cobalt Turquoise Hue, Prussian Blue Hue, Paynes Grey, Titanium White
DecoArt media Liquid Glass
Archival Ink - Jet Black
Removable Tape
Heat Tool

Instructions:
Step 1:  Paint a coat of DecoArt White Gesso over the canvas, let dry
Step 2:  Paint the canvas with the fluid acrylics and let dry thoroughly (or use a heat tool)


Step 3: Stamp the Script Lines randomly on the canvas with Archival Jet Black ink, use a block behind the open part to get a better impression, heat set


Step 4:  Place a block under the open part of the canvas, use removable tape to place the birdhouses stencil near the left side of the canvas, use a palette knife to apply a coat of Gold Embossing Paste over the image, remove stencil and place in water for cleaning
Step 5:  Apply various sizes of Liquid Glass drops over the canvas randomly, let drops and paste dry well
Hint: pasting on canvas can be difficult, if some paste slips under a bridge, simply use a pointed tool (a toothpick will work too) to carefully clean out the bridge areas

Step 6:  Use a small  brush to add some white highlights around the Liquid Glass and around the canvas, use a moist cloth to wipe some off if it gets too heavy


I loved each stage s0 it was hard to keep adding layers, but I love the finished product too! It fits into my studio display great!


For a complete list of today's designers:

Stampendous Blog

Happy Creating,
Louise

Friday, March 10, 2017

Creamy Birthday Cupcake!

We've been having a Superstar Birthday celebration on the Stampendous Design Team this week! That means we have been sharing ideas using some of our awesome stamps and stencils to create birthday projects!

The FMS4072 Creamy Cupcake Metal Stencil on a stenciled background using the FMS4074 Batik Metal Stencil and a simple Happy Birthday sentiment from the SSC1115 Birthday Assortment set on the Fitted Frames all combined in a monochromatic scheme create a sweet birthday greeting!


Stampendous:
FMS4072 Creamy Cupcake Metal Stencil
FMS4074 Batik Metal Stencil
SSC1115 Birthday Wish Perfectly Clear Stamps
DCP1006 Fitted Frames Set B
MPW811 Mixed Media White Paper
GL220U Crystal Multi Glitter

Dreamweaver:
DWDEP Regular Embossing Paste
DWDPK Dreamweaver Palette Knife
DWLM2010 Paste Spreader
DWLL332 Picasso Stencil
DWNHB12 1/2" Brush #12 Natural Handle

Plus:
My Color Cardstock - Pink Delight, Pimento, Coral Rose
Memento Ink - Rose Bud, Lady Bug
Dries Clear Glue
Removable Tape
Die Cut Machine
Foam Tape

Instructions:
Step 1:  Fold a 6" x 9 1/2" piece of Coral Rose cardstock in half to form an A6 card
Step 2: Tape the Creamy Cupcake stencil to a 3 1/2" x 4 1/2" piece of  Pink Delight cardstock with removable tape
Step 3: Use a palette knife and paste spreader to apply Regular Embossing Paste to the Creamy Cupcake design, remove stencil, let paste dry
Step 4:  When the paste is dry, use the stencil brush to add color to the "cupcake wrapper" part of the design, using the picasso tool to keep color off the "frosting", use a small paint brush to apply glue to the frosting then sprinkle with Crystal glitter
Step 5:   Tape the Batik stencil to a 4 1/4" x 5 1/2" piece of white with removable tape, use the stencil brush to add color over the design
Step 6: Adhere the Batik to a 4 3/8" x 5 5/8" piece of Pimento then to the card front
Step 7:  Adhere the Creamy Cupcake to a 3 5/8" x 4 5/8" piece of Pimento then to the Batik layer
Step 8:  Stamp the Happy Birthday image on white paper, use the Fitted Frames to die cut the Happy Birthday and a matching frame from a piece of Pimento
Step 9:  Use foam tape to apply the Happy Birthday to the card front

Today's designers are listed on the

Stampendous Blog

Happy Creating,
Louise

Wednesday, March 8, 2017

Happy Birthday!

We're having a Superstar Birthday celebration on the Stampendous Design Team this week! That means we are sharing ideas using some of our awesome stamps and stencils to create birthday projects!

Today I combined  the DWLJ920 Jumbo Happy Birthday stencil with the DWLJ863 Swirls stencil for another fun card!


Stampendous:
MPW811 Mixed Media White Paper

Dreamweaver:
DWLJ920 Jumbo Happy Birthday
DWLJ863 Swirls
DWGHB-6 1/4" Brush #6 Gold Handle Brush
DWNHB-12 1/2" Brush #12 Natural Handle

Plus:
My Color Cardstock - Coral Rose, Fireflies
Distress Inks - spun sugar worn lipstick, picked raspberry, squeezed lemonade
Removable Tape
Die Cut Machine
Rubber Embossing Mat
Foam Tape
Black Fine Line Pen

Instructions:
Step 1:  Fold a 6" x 9 1/2" piece of Coral Rose cardstock in half to form an A6 card
Step 2: Place the Jumbo Happy Birthday stencil face down (so you can't see the stencil number) on the large platform of a die cut machine, spritz a 4 1/4" x 5 1/2" piece of white cardstock lightly with water and line it up on the stencil, carefully place the rubber embossing mat over the paper, add two cutting plates and run through the die cut machine
Step 3: Leave the stencil on the embossed image, use a 1/2 brush to apply spun sugar over all the letters, switch to worn lipstick and bring the color up from the bottom of each letter, but don't completely cover the spun sugar, apply a little of the picked raspberry near the bottom of each letter, use the black fine line pen to outline each opening of the stencil, remove and clean stencil
Step 4:  Place the Swirl stencil over the colored Happy Birthday, use 1/4" stencil brushes to apply some pink and yellow swirls to the background, try to avoid the letters as much as possible, move the stencil as necessary, remove and clean the stencil
Step 5:  Run the picked raspberry ink around the edge of the paper and use the 1/4" brush to rouge just a little ink near the edges
Step 6: Cut 4 squares 1 1/2" x 1 1/2" from the Fireflies paper and adhere them to each corner of the Happy Birthday layer leaving a small edge showing on each
Step 7:  Cut 2 pieces 1 1/2" x 1/2" from the Fireflies paper and adhere in the center of the top and bottom edges
Step 8:  Use foam tape to attach the Happy Birthday to the card front

A list of today's designers can be found on the

Happy Creating,
Louise

Monday, March 6, 2017

Superstar Birthday!

We're having a Superstar Birthday celebration on the Stampendous Design Team this week! That means we are sharing ideas using some of our awesome stamps and stencils to create birthday projects!

This card combines the Confetti Balloons stencil (FMS4067) with the Oh My Stars (R287) stamp in the background, and the Superstar Birthday (V331) stamp to create a fun, colorful card!

Superstar Birthday!
Supplies:

Stampendous:
FMS4067 Confetti Balloons Metal Stencil
CRV331 Cling Superstar Birthday
CRR287 Cling Oh My Stars
MPW811 Multi Media White Paper
MEM01 Memento™ Tuxedo Black Ink by Tsukineko®

Plus: 
My Color Cardstock – Winter Lake
Black Fine Line Pen
Copic Markers – Y00, Y02, Y06, Y08, R00, R05, R08, R81, R85, BV0000, BV02, B32, B34, YG01, YG03
Ribbon – Yellow, Lavender
Foam Tape

Instructions:
  1. Fold a 7" x 10" piece of Winter Lake cardstock in half to form an A7 card
  2. Tape the Confetti Balloons stencil to a 3 1/4” x 5 1/8” piece of white cardstock with removable tape
  3. Use a fine line pen to outline all the openings of the stencil, remove stencil
  4. Stamp the Oh My Stars on a 4 1/8” x 5 3/8” piece of white cardstock with the Tuxedo Black ink
  5. Color the balloons and stars with Copic Markers
  6. Stamp the saying on a 2” x 2 7/8” piece of white with the black ink, color around the letters with markers
  7. Run a red marker around the edge of the Confetti Balloons, green around the Oh My Stars, and blue around Superstar Birthday
  8. Adhere the Oh My Stars near the lower right edge of the card
  9. Adhere two small “flags” of ribbon to the right side of the Confetti Balloons near the top
  10. Adhere the Confetti Balloons layer to the upper left side of the card
  11. Adhere a ribbon “flag” on the left edge of the Superstar Birthday
  12. Use foam tape to add the saying
Here's the list of today's designers:

Stampendous Blog

Kristine Reynolds

Jamie Martin

Alison Heikkila

Louise Healy

Happy Creating,
Louise

Friday, March 3, 2017

With Sympathy

What a great week it's been! The Stampendous Design Team members have been sharing beautiful projects featuring the great stencils offered by Stampendous. Stencils are easy to work with and allow you to create wonderful cards and projects with a wide variety of techniques. 

Today I created a quick, easy, yet lovely, Sympathy card. Usually we don't have a lot of notice for when we might need a sympathy card, so make several in a variety of colors to keep on hand.  This turquoise shade is very soothing. The Southwest Background (DWLJ807) pairs nicely with the With Sympathy (DWLM174) stencil.

"With Sympathy"
Stampendous:
MPW811 Mixed Media White Paper

Dreamweaver:
DWLM174 With Sympathy
DWLJ807 Southwest Background
DWNHB-12 1/2" Brush #12 Natural Handle

Plus:
My Color Cardstock - Seafoam, Tropical Splash
Distress Inks - peacock feathers, crushed pistachio
Removable Tape
Foam Tape

Instructions:
Step 1:  Fold a 4 3/4" x 12" piece of Seafoam cardstock in half to form a top fold A6 card
Step 2: Tape the With Sympathy stencil to a 2 1/4" x 3 1/4" piece of  white paper with removable tape
Step 3: Use a 1/2" stencil brush to apply two inks to the design, remove and clean the stencil
Step 4:  Tape the Southwest Background stencil on a 2 1/8" x 5 1/2" piece of white cardstock lining the stencil opening along the top edge of the paper, use a 1/2" stencil brush to apply the two inks keeping the color a little light towards the bottom, move the stencil down lining up the pattern and continue inking to the bottom edge
Step 5:  Mat the With Sympathy on a 2 3/8" x 3 3/8" piece of Seafoam, and the Southwest Background on a 2 1/4" x 5 5/8" piece of Seafoam
Step 6: Adhere a 1 1/2" x 6" strip of Tropical Splash near the left edge of the card front, then adhere the Southwest Background image on it leaving a small edge of Tropical Spash around the top, bottom and left side
Step 7:  Adhere a 1 1/2" x 3 5/8" piece of Tropical Splash across the top edge of the With Sympathy leaving a small edge of Tropical Splash across the top and two upper sides
Step 8:  Use foam tape on the right edges of the With Sypathy, and adhesive to attach the piece to the lower portion of the card front

More great ideas can be found here:

Stampendous Blog

Pam Bray

Jamie Martin

Janelle Stollfus

Alison Heikkila

Louise Healy


Happy Creating,
Louise

Wednesday, March 1, 2017

Succulents and Cactus Fun!

Welcome to March! This year is already speeding by, although that means Spring will be here soon! Last week we had three days in the 70's! Of course, Saturday temps in the 40's quickly brought us back to reality. 

This week the Stampendous Design Team members are sharing projects featuring stencils. Stampendous has a fabulous line of stencils from Dreamweaver of course, but, in addition, Fran has designed some new stencils.  The lovely Succulent Metal Stencil (FMS4055) is perfect for any occassion.  Add a little butterfly for a great finishing touch!

Succulent Beauties!
Supplies:

Stampendous:
FMS4055 Succulent Metal Stencil
SSC1250 Bible Journal Perfectly Clear Stamps
SSC1251 Bible Promises Perfectly Clear Stamps
MPW811 Mixed Media White Paper
Acrylic Handle
MEM01 Memento™ Tuxedo Black Ink by Tsukineko®

Dreamweaver:
DWLL332 Picasso Stencil
DWDEP Regular Embossing Paste
DWDPK Dreamweaver Palette Knife
DWLM2010 Paste Spreader
DWGHB-6 1/4" Brush #6 Gold Handle Brush

Plus:
My Color Cardstock Sky, Grasshopper
Graphic45 Versailles 4501131
Distress Inks - old paper, bundled sage, forest moss, pine needles, tumbled glass, mermaid lagoon
Removable Tape
Fine Line Black Pen

Instructions:
Step 1:  Fold a 7" x 10" piece of Sky cardstock in half to form an A7 card
Step 2: Tape the Succulent stencil to a 4" x 5 1/4" piece of  white paper with removable tape
Step 3: Use a palette knife and paste spreader to apply Regular Embossing Paste over the design, remove stencil and place in water for cleaning later, let paste dry
Step 4:  Tape the clean dry stencil back over the dry paste with removable tape, use 1/4" stencil brushes and the Picasso tool to apply inks to the dry paste
Step 5:  Cut a 4 1/4" x 5 1/2" piece of Grasshopper, adhere Succulents to the green mat
Step 6: Cut a 4 3/4" x 6 3/4" piece of  the Graphic45 paper, use the small leaf stamp from the Bible Promises set and old paper ink to randomly stamp the leaves over the blue paper, use the blue stencil brush to brush mermaid lagoon ink along all the edges, adhere to the card front, adhere the Succulent layer on the blue layer
Step 7:  Stamp the small butterfly from the Bible Journal set on white paper with Memento Tuxedo Black ink, color the butterfly with the Distress Inks, cut out, adhere to the Succulent layer, use a fine black pen to add antennae

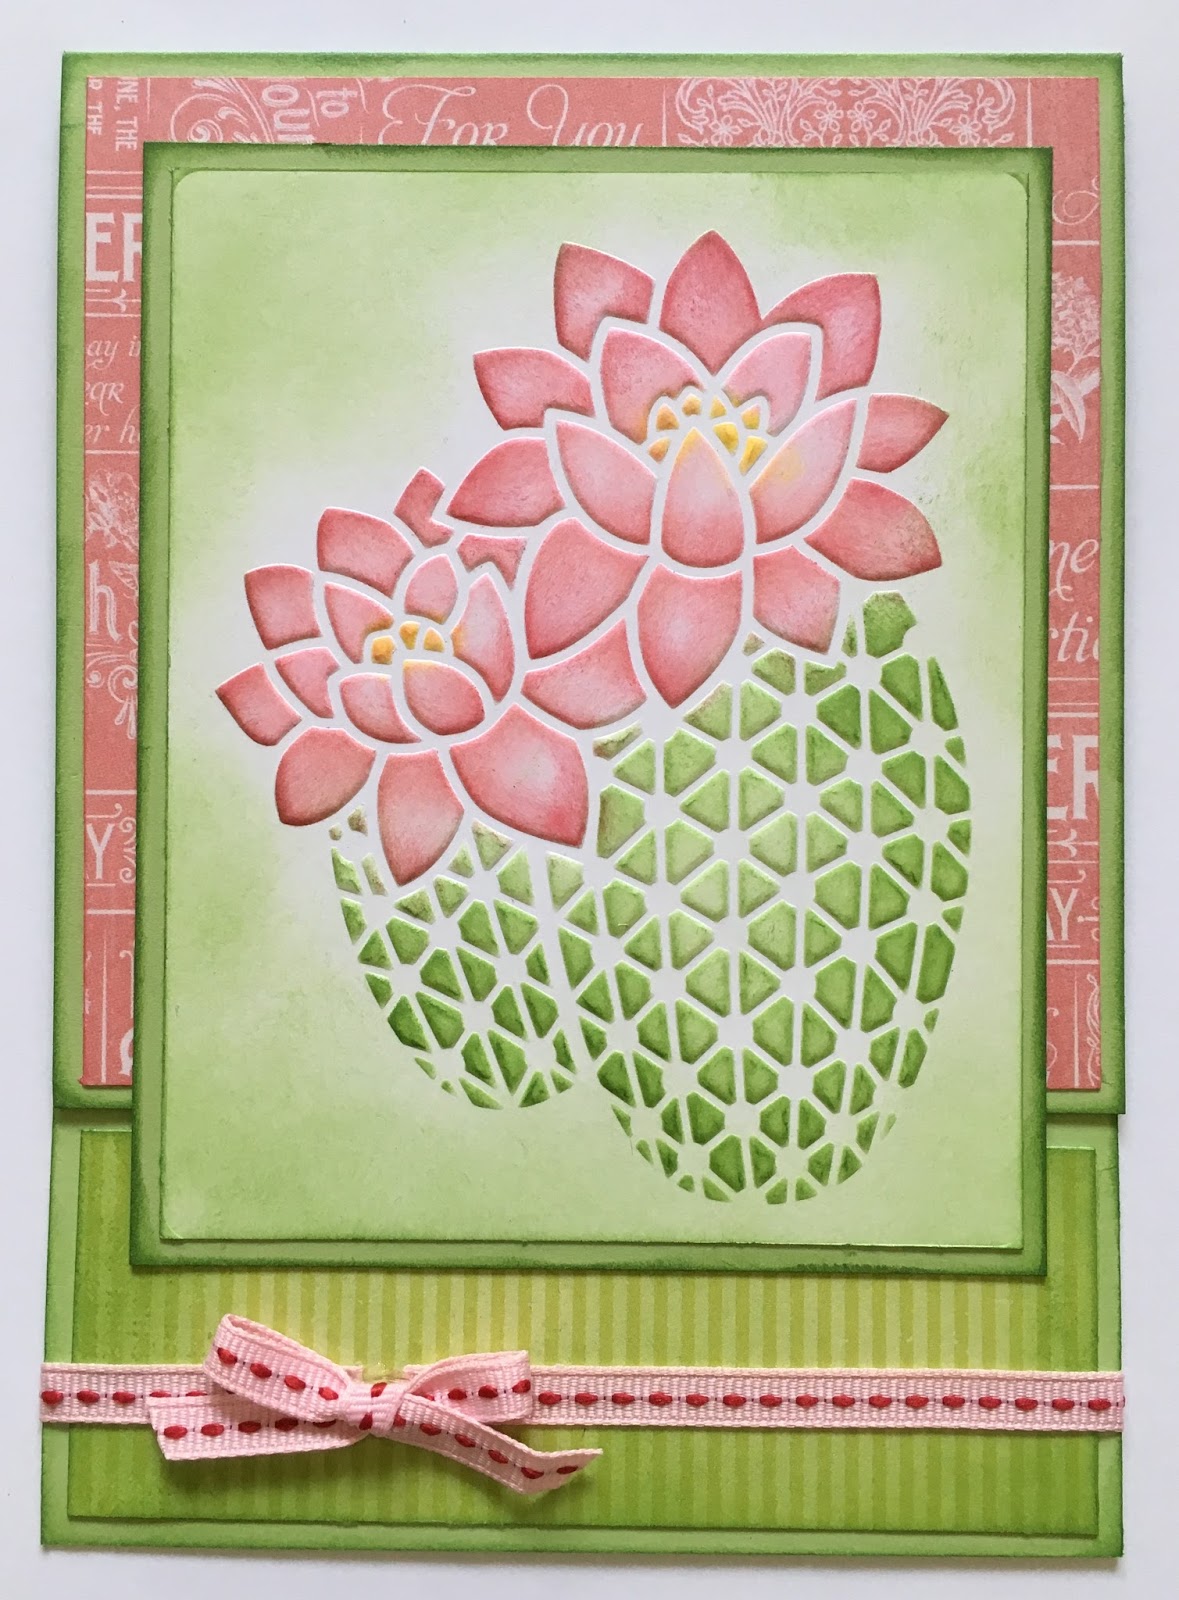
But wait! BONUS PROJECT! We have another beauty that Fran designed called Cactus Flower (FMS4054). It makes a fabulous card too.

Cactus Fun!
Stampendous:
FMS4054 Cactus Flower Metal Stencil
MPW811 Mixed Media White Paper

Dreamweaver:
DWNHB-12 1/2" Brush #12 Natural Handle
DWGHB-6 1/4" Brush #6 Gold Handle Brush

Plus:
Light Green Cardstock
Graphic45 Cardstock June Flourish 4501040
Green Striped Cardstock
Brilliance Ink - Sunflower Yellow, P. Coral, Rocket Red, P. Thyme
Rubber Embossing Mat
Die Cut Machine
Removable Tape
Creative Impressions 70913 1/4" Pink with Red Stitch Ribbon
Fabri-Tac

Instructions:
Step 1:  Score a 5" x 12" piece of paper at 5" from one end, fold at score line to form a top flap A7 card
Step 2: Use the Rubber Embossing Mat and die cut machine to dry emboss a 4" x 5" piece of white using the Cactus Flower Metal Stencil
Step 3: With the stencil in place over the embossed design, use a 1/4" and 1/2" stencil brush es to add color to the design, remove the stencil and brush green ink around the edges
Step 4:  Cut a 4 3/4" x 4 3/4" piece of the Graphi45 paper, edge with the Coral ink and adhere to the front flap of the card
Step 5:  Cut a 1 3/4" x 4 3/4" piece of the Green Striped paper and brush green ink around the edge of the paper, adhere to the bottom of the card front
Step 6: Brush green ink all around the outer edges of the card
Step 7:  Cut a 4 1/4" x 5 1/2" piece of green paper, brush edge with green ink, adhere the Cactus Flower image to the green mat, then to the flap part of the card front
Step 8: Wrap a piece of the ribbon around the bottom part of the card and attach with Fabri-Tac
Step 9:  Tie a small bow and adhere to the ribbon using Fabri-Tac

Today's designers:

Stampendous Blog

Kristine Reynolds

Jamie Martin

Katy Leitch

Louise Healy


Happy Creating,
Louise

Wednesday, February 22, 2017

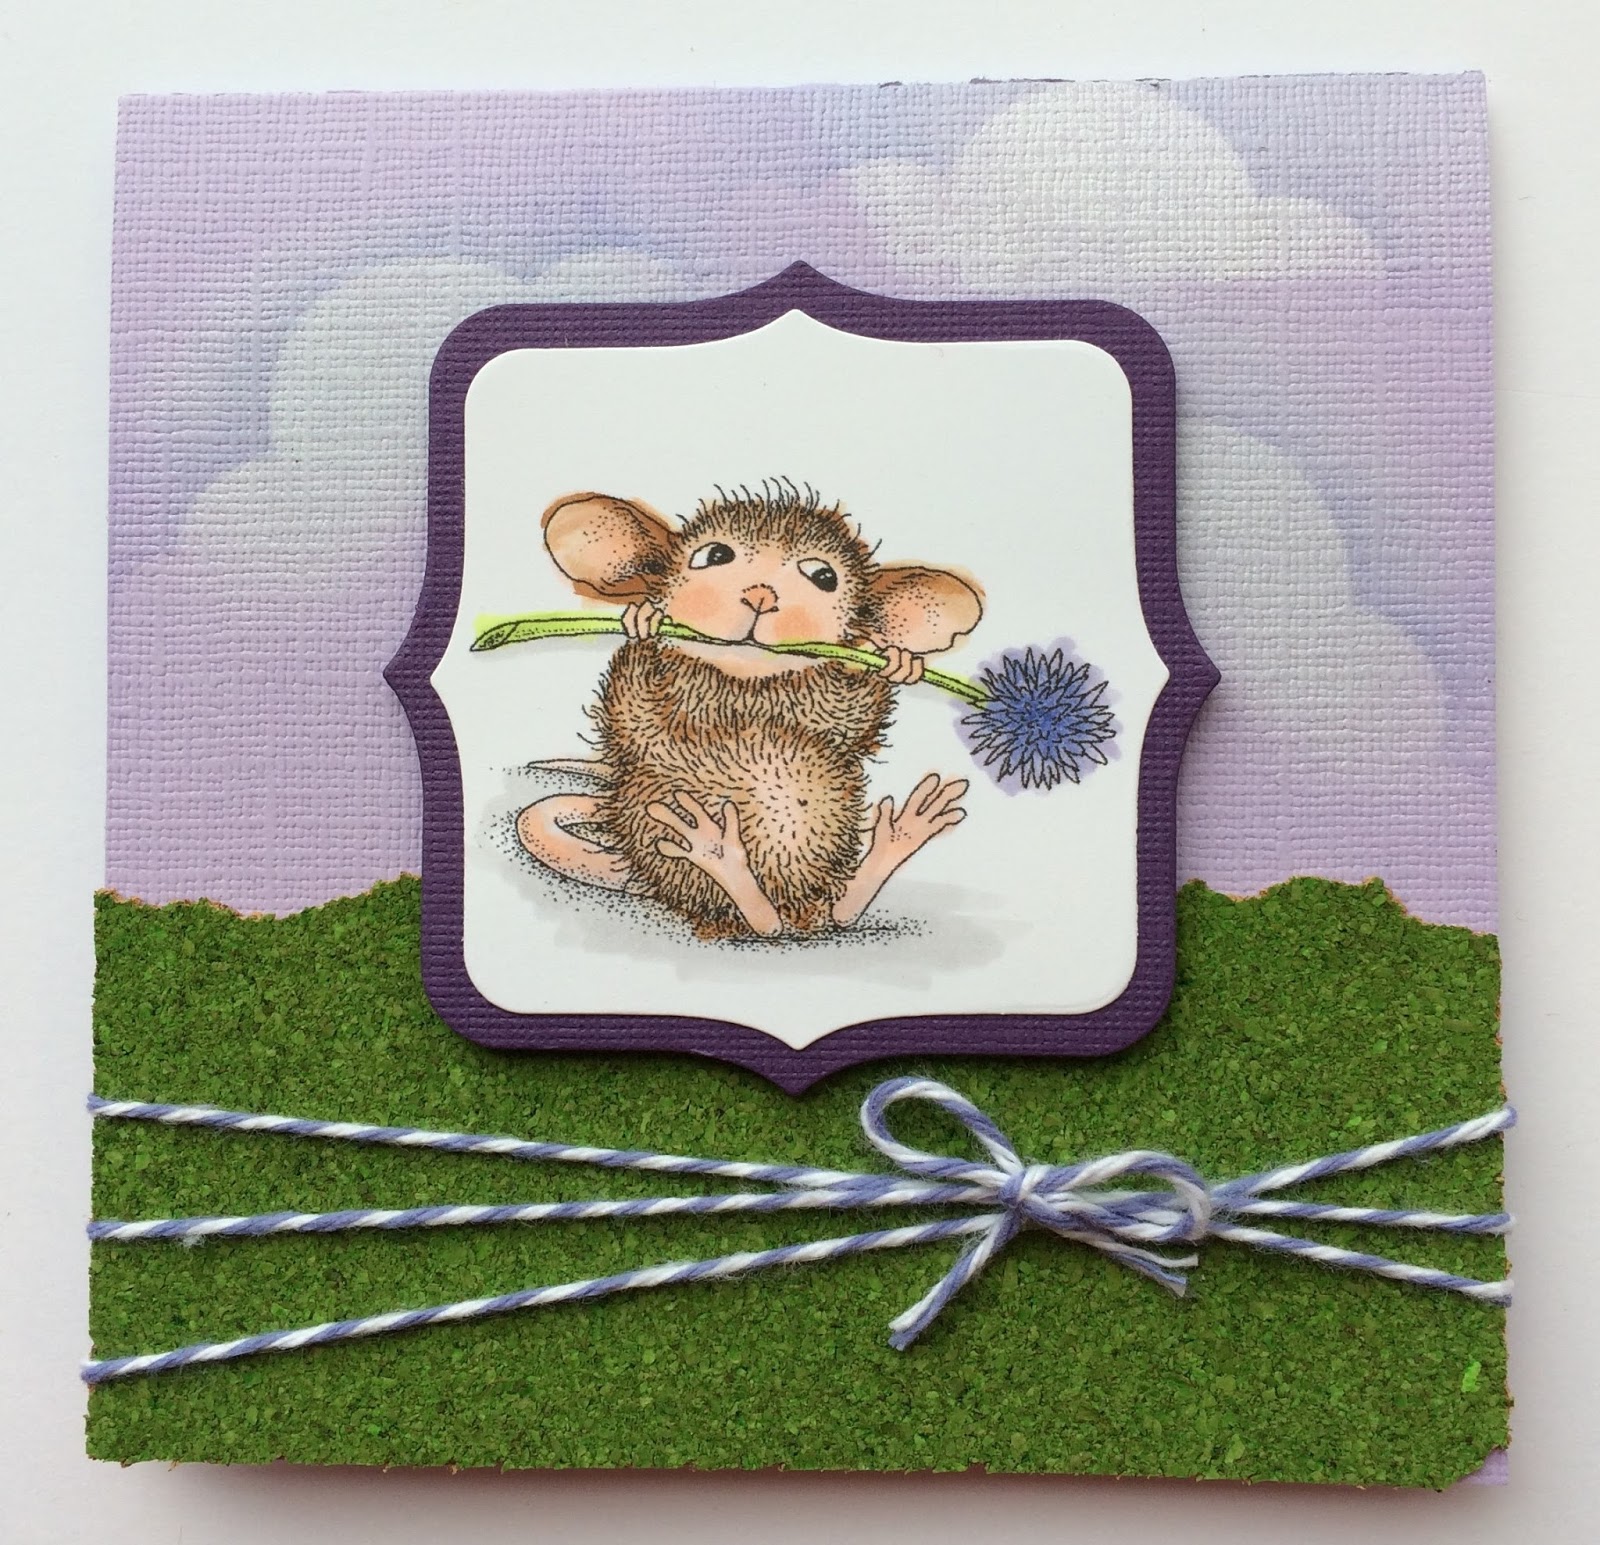
Chive Chewing!

HMH04 Chive Chewing


Stampendous:
HMCH04 Chive Chewing Cling Stamp
DCP1005 Fitted Frames A Cutting Die Set Size F
MPW811 Mixed Media White Paper
Acrylic Handle
MEM01 Memento™ Tuxedo Black Ink by Tsukineko®

Dreamweaver:
DWLL332 Picasso Stencil
DWHNB-12 1/2" Brush #12 Natural Handle

Plus:
My Colors Cardstock - Plum, Lilac Mist
DCWV Green Cork Paper
Copic Sketch Markers - BV00, BV02, BV04, BV11, E01, E31, E33, E37, E95, YG01, YG03, T1
Brilliance Inks Moonlight White, Lavender
Die Cut Machine
WhiskerGraphics Baker's Twine
Scrapbook Adhesive White Foam Squares

Instructions:
Step 1:  Fold a 4 1/4" x 8 1/2" piece of Lilac Mist cardstock in half to form a square, top fold card
Step 2:  Use a 1/2" stencil brush and Brilliance Moonlight White ink to rouge 3 areas of white ink for the clouds
Step 3: Tape off the small openings on the Picasso Stencil with removable tape, place cloud edge over one of the white areas and use a 1/2" stencil brush to lightly brush Lavender ink off the Picasso towards the paper, repeat to form as many clouds as you want
Step 4:  Stamp the Chive Chewing image on a piece of Mixed Media White cardstock using Memento Tuxedo Black Ink, color with Copic Markers
Step 5:  Using the size F frames from the Fitted Frames set, cut the larger frame on Plum cardstock and the smaller frame on the colored image
Step 6: Adhere the two frames together
Step 7:  Tear one long edge of a 2" x 4 1/4" piece of green cork and adhere the cork to the bottom edge of the card front
Step 8: Tie a piece of Baker's Twine around the green cork three times and tie a bow
Step 9: Use foam squares to attach the mouse image to the center


Happy Creating,
Louise