Friday, June 13, 2014

Dreamweaver and Imagine Crafts Day 5!


 It's our final day of the first ever collaboration week with Imagine Crafts/Tsukineko! We've shared all of our toys on both sides, and have shown you the Endless Possibilities! Three prize packages are available, each containing one set of each of these inks and stencils/dies. Just leave comments on each post of each day this week (June 9th - June 13th) for a chance to win! Winners will be announced on Tuesday, June 17th!
Imagine Crafts New StazOn Pads from Tsukineko
Stencils and Dies Prize Package

For my final project this week I am showing the Faux Tile technique. If you want the step by step pictures of how to do this click here to see the tutorial I posted last year. This one uses a different overlay stencil, but the steps are the same.

Faux Tile Technique
Here's the quick "how-to" version:

  • Dry emboss the Diamond grid stencil (LJ882) on white cardstock
  • With the grid stencil still in place, overlay the Wren stencil (LL571) and tape in place with removable tape
  • Use small stencil brushes to apply ink to the Wren design, use the Picasso (LL332) to help with the placement of colors. All the colors I used are from IMAGINE Crafts. They were Radiant Neon Electric Yellow, VersaFine Toffee, Habanero, Satin Red, Spanish Moss, Olympia Green.
  • When you finish adding the color, remove the Wren stencil and wipe it off with a soft cloth.
  • Use small pieces of removable tape over the bird area of the stencil, then tape the stencil  over and down from the original and color another set of flowers and leaves
  • Remove the Wren stencil and use a 3/4" stencil brush and VersaFine Deep Lagoon to brush in the "sky". Use the cloud end of the Picasso to create a couple of clouds
  • Remove the grid stencil and wipe it off with a soft rag and return to the design
  • Use a finger dauber to apply a coat of VersaMark over the entire grid
  • Remove stencil, set aside
  • Sprinkle with clear embossing powder, heat set
  • Repeat the VersaMark, embossing powder and heating two more times to get a smooth tile-like finish
  • Mount into a beautiful card and embellish with a wonderful ribbon from May Arts!
I hope you have enjoyed our creations this week, we have had a lot of fun trying new products!  Don't forget to leave comments for the chance to win those great prize packages. Thanks for all your comments, I truly appreciate each one.


Happy Creating,
Louise


Thursday, June 12, 2014

Dreamweaver and Imagine Crafts Day 4!

 The fun continues in our first ever collaboration week with Imagine Crafts/Tsukineko! We've shared all of our toys on both sides, so be prepared for Endless Possibilities! Three prize packages are available, each containing one set of each of these inks and stencils/dies. Just leave comments on each post of each day this week (June 9th - June 13th) for a chance to win! Winners will be announced on Tuesday, June 17th!
Imagine Crafts New StazOn Pads from Tsukineko
Stencils and Dies Prize Package

Thursdays are the Dream Teams normal day for posting ideas based on our monthly challenge, so today I chose to incorporate the hop and our challenge of "Old, New, Borrowed, Blue" in my creation. Here it is:
Fairy flower circle - Glossy Blue Embossing Paste with Crystal glitter
Fan pattern and Petals background - VersaFine Majestic Blue Letterpress Technique
This card fits all the themes. Old = LJ813 Fan Pattern is from 2001, New = LM2012 Fairy flower circle was released in 2012 (newish counts), Borrowed = the card layout is from some cards I saw on Pinterest, and Blue = well, I think the card speaks for itself on this one! The background stencil is LJ899 Petals background. The ink is VersaFine Majestic Blue from IMAGINE Crafts, and the flower is done with Glossy Blue Embossing Paste. The ribbon is from May Arts, it wasn't quite the color I wanted, so I swiped the Majestic Blue ink pad over it to darken it so it would match better.

Letterpress technique used on Petals and Fan pattern:

  • Tap the VersaFine Majestic Blue ink pad all over the back of the stencil
  • Carefully place it on a clean paper towel on the large platform of a die cut machine
  • Place white cardstock over the ink and hold in place while covering it with the rubber embossing mat
  • Add two cutting plates (I use ones with no cuts when I emboss) and run through your machine
  • Remove the embossed image and place it face up on the table
  • Use a 3/4" stencil brush to brush a light coat of the Majestic Blue over the embossed areas
  • Trim to fit, mount on white cardstock that has been edged with the blue ink
Paste embossing:
  • Tape the Fairy flower stencil to white cardstock with removable tape
  • Use a palette knife and paste spreader to apply a coat of Glossy Blue Embossing Paste over the stencil
  • Remove the stencil and place in water for cleaning
  • Immediately sprinkle the wet paste with Crystal glitter, let dry
  • Edge a slightly larger square of white cardstock with the blue ink
  • Mount the Fairy flower to the edged square and then onto the card


Happy Creating,
Louise


Wednesday, June 11, 2014

Dreamweaver and Imagine Crafts Day 3!

The Dreamweaver Stencils design team is pairing up with Imagine Crafts to bring you a week filled with creative ideas, you won't want to miss a moment of it!
 Welcome to our first ever collaboration week with IMAGINE Crafts/Tsukineko! We've shared all of our toys on both sides, so be prepared for Endless Possibilities! Three prize packages are available, each containing one set of each of these inks and stencils/dies. Just leave comments on each post of each day this week (June 9th - June 13th) for a chance to win! Winners will be announced on Tuesday, June 17th!
Imagine Crafts New StazOn Pads from Tsukineko
Stencils and Dies Prize Package
Today I am featuring the beautiful Floral w/dots stencil (LJ927) and VersaFine inks from IMAGINE Crafts. I just love the rich color you get from these quick drying pigment inks.


This couldn't be easier, simply:

  • Tape the stencil to white cardstock with removable tape
  • Use 1/4" stencil brushes to add color to the design, be sure to have your Picasso (LL332) handy to cover small areas or to work as a shield ( I used Crimson Red & Imperial Purple on the big flower, Habenero & Satin Red on the small flowers (with Memento Dandelion in the centers), and Spanish Moss & Olympia Green on the leaves) 
  • Here's what it will look like at that point
I did two at a time to try two different embossing pastes over them
  • Clean of the stencil with a soft cloth to get some of the ink off (I left mine in place while I did this)
  • Use a palette knife and paste spreader to apply a coat of Regular Embossing Paste to one image
  • Remove the stencil and immediately sprinkle the wet paste with Crystal glitter, tap off extra, and let paste dry
  • Use a palette knife and paste spreader to apply a coat of Translucent Embossing Paste over the other image
  • Remove the stencil and immediately sprinkle the wet paste with Crystal glitter, tap off extra, and let paste dry
  • Here's how they look when dry
Regular Embossing Paste on left, Translucent Embossing Paste on right
Both are beautiful, the Translucent just lets the bold color come through, the Regular leaves it with a more muted look. I could now go back to the one with Regular Paste and add more color if I choose, or use it in the muted form (yes, I am able to stencil right over the glitter, your brush gets a little sparkly, but it washes out). 
My finishing touch was to take a small piece of velvet ribbon from May Arts and tape off one "Thank You" from the Thank yous stencil (LG691), place the stencil on the ribbon and apply Glossy White Embossing Paste over the words. Let dry thoroughly.

Just Imagine the possibilities of what everyone else has created!

Happy Creating,
Louise


Tuesday, June 10, 2014

Dreamweaver and Imagine Crafts Day 2!


 Welcome to Day 2 of our first ever collaboration week with Imagine Crafts/Tsukineko! We've shared all of our toys on both sides, so be prepared for Endless Possibilities! Three prize packages are available, each containing one set of each of these inks and stencils/dies. Just leave comments on each post of each day this week (June 9th - June 13th) for a chance to win! Winners will be announced on Tuesday, June 17th!
Imagine Crafts New StazOn Pads from Tsukineko
Stencils and Dies Prize Package

I was so inspired by yesterday's projects using the irRESISTible sprays that I had to try them for myself! Here's what I created for you today:
LL3039 Owl buddy, DG751 Nesting Owls, LJ849 Bare Trees
He has a few steps, but I had so much fun and love how he turned out. Follow the directions to create your own design!

  • Place the Owl buddy stencil (LL3039) on cream cardstock in the bottom of your spray box
  • Shake the Bronze irRESISTible spray from imagine crafts vigorously
  • Spray over stencil until you get the level of coating you like (too much will cause some leaking under the stencil edges)
  • Lift off the stencil and place in water for cleaning, let the owl dry
  • Meanwhile, place the clean stencil face down on a paper towel in the spray box
  • Spray over the back of the stencil with the Bronze spray until a nice coating covers the stencil
  • Carefully lift the stencil by the edges and take it out of the box onto a clean paper towel
  • Immediately lay a piece of glossy cardstock over the inked stencil, rub it gently, then peel it off (you have to work quickly because the irRESISTible starts to dry immediately)
  • Place the stencil in water and let the glossy paper dry
  • Repeat the process with the Bare Trees stencil (LJ849) on glossy cardstock to create the background - you must move very quickly with this one because of all the thin bridges
  • Use the matching owl from the Nesting Owls die set (DG751) to cut the pieces from the owl that was sprayed on natural cardstock. It's easy to line the die up over the sprayed image, cutting side toward the image, tape in place, and run through your machine
  • Edge each piece with a black marker, I used the Memento Tuxedo Black marker from imagine crafts
  • Glue each piece in place on the glossy cardstock image
  • Mat the owl and the trees on black mats
  • Add some beautiful ribbon from May Arts
  • The cardstock for the base card was too stark so I used an ink blusher from imagine crafts to rouge on some of their beautiful Delicata Golden Glitz ink, it gave a golden shimmer to the cardstock that matched the ribbon perfectly

A close up showing the glossy image with the die cut image glued in place
Here's what the glossy image looked like before the die cut piece were added, and the negative
left over after die cutting (which will be used in a different project!)

LL3039 Owl buddy and its matching die from DG751 Nesting Owls

Just Imagine the possibilities of what everyone else has created!

Happy Creating,
Louise


Monday, June 9, 2014

Dreamweaver and Imagine Crafts Day 1!

 Welcome to our first ever collaboration week with Imagine Crafts/Tsukineko! We've shared all of our toys on both sides, so be prepared for Endless Possibilities! Three prize packages are available, each containing one set of each of these inks and stencils/dies. Just leave comments on each post of each day this week (June 9th - June 13th) for a chance to win! Winners will be announced on Tuesday, June 17th!
Imagine Crafts New StazOn Pads from Tsukineko
Stencils and Dies Prize Package

Just Imagine the possibilities of what everyone else has created!

We were fortunate to receive a box of wonderful products to share with you this week. Here's a peek at some of the things you'll be seeing used throughout the hop!

The Neon inks just screamed summer to me, so I decided to start with those, but how to choose which colors, hmmm. All of them, of course! LX7011 Big Dots was the perfect starting place, all of them fit!

Steps:
  • Tape stencil to white cardstock with removable tape
  • Place a piece of removable tape on the column next to the first column (yellow)
  • Use a 3/4" stencil brush to apply the first color down the first column
  • Remove the tape from the second column and move it over to the third column
  • Place a piece of removable tape over the column just colored
  • Color the next column
  • Keep moving the two pieces of tape over until you have all the colors!
  • Clean stencil
  • The colors are called Radiant Neon Electric Yellow, E. Orange, E. Coral, E. Pink, E. Purple, E. Blue, E. Green
  • Tape the Tiger slippahs (LM246) to white cardstock, use 1/4" stencil brushes and the Picasso (LL332) to apply color
  • Cut them out leaving a small white edge around
  • Mount them on Bazzill Limeade cardstock, and cut around them again leaving a small green edge
  • Color the happy birthday (LM248) with some of the colors
  • Layer on a mat of Limeade and Pink
  • Mat the dots on Limeade and Pink also
  • Use foam tape to add the sentiment and sandals
Don't miss the other team members who are sharing today and be sure to stop by each day this week for more ideas!

Happy Creating,
Louise

Thursday, June 5, 2014

Old, New, Borrowed, Blue

At Dreamweaver Stencils, we love to make our monthly challenges something for everyone, and not so strict that no one wants to play along. This month our challenge is, "Old, New, Borrowed, Blue", with the obvious thought being a wedding theme...but not necessarily. Add an old embellishment or picture. Use a new stencil design or technique. Borrow, or CASE (copy and say everything) another designers project, and obviously, blue...is blue. Where will YOUR creative process take you for this month? We'd love to see! And remember, linking your creations with the Inklinkz tool at the end of the team posts, provides you with the opportunity to win the stencil of your choice!
For this first week of our new challenge, I have gone with the Old/New theme.  Ever since the Stylized Dahlia stencil (LG743) was released in 2012, it has been one of my favorite stencils (I know, I say that about all of them!). It is so versatile and looks wonderful in a large variety of techniques. Here are some samples of a class I taught in June of 2012 with this fabulous stencil (for the "Old" part of the challenge):
LG743 - Red Glossy Embossing Paste with Crackle Paste over, let dry, then
stencil with Brilliance inks from Tsukineko
LG743 - Double Glitter Technique, but with Ranger Distress Embossing Powders
instead of glitter (heat set after powders are all in place)
LG743 - Molten Magic Technique, Pearlescent Embossing Paste with
Metallic F/X powders sprinkled over wet paste, heat until bubbly
When Dreamweaver announced last month that one of the four new die cuts being released in June was the matching die for this wonderful stencil, I was thrilled! For the "New" part of the challenge here's what I created:
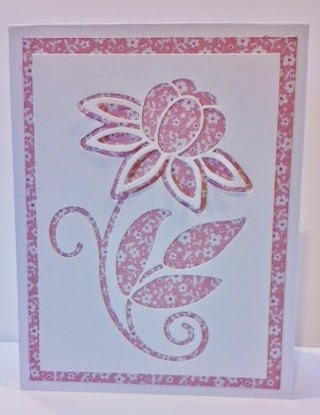
DG743 - Stylized Dahlia die, cut out of plain white cardstock and the negative image mounted over
patterned cardstock. Notice how you can leave the "petals" loose for more dimension (save the
other pieces for another card)
LG743 - Pasted embossed with Glossy Red Embossing Paste, let dry
DG743 - place double sided mounting paper on the back of some pink and green papers,
die cut images and peel off release paper to stick the pieces where you want them
*Note* - While Glossy Red Embossing Paste is no longer available, it is easy to make your own using Translucent Embossing Paste (about 1 Tbsp), and red acrylic paint (tube not bottle) mixed in (start with about 1/4 tsp, then adjust)

Next week the Dream Team will be doing a collaborative Blog Hop with Imagine Crafts. Each day various team members will be posting ideas using Dreamweaver stencils and various products from Imagine Crafts. The fun starts Monday, and the grand finale will be Friday. Be sure to stop by each day, I'm sure there will be prizes involved!

Here's what our "A" team has been working on this week:

Louise Healy

Happy Creating,
Louise